
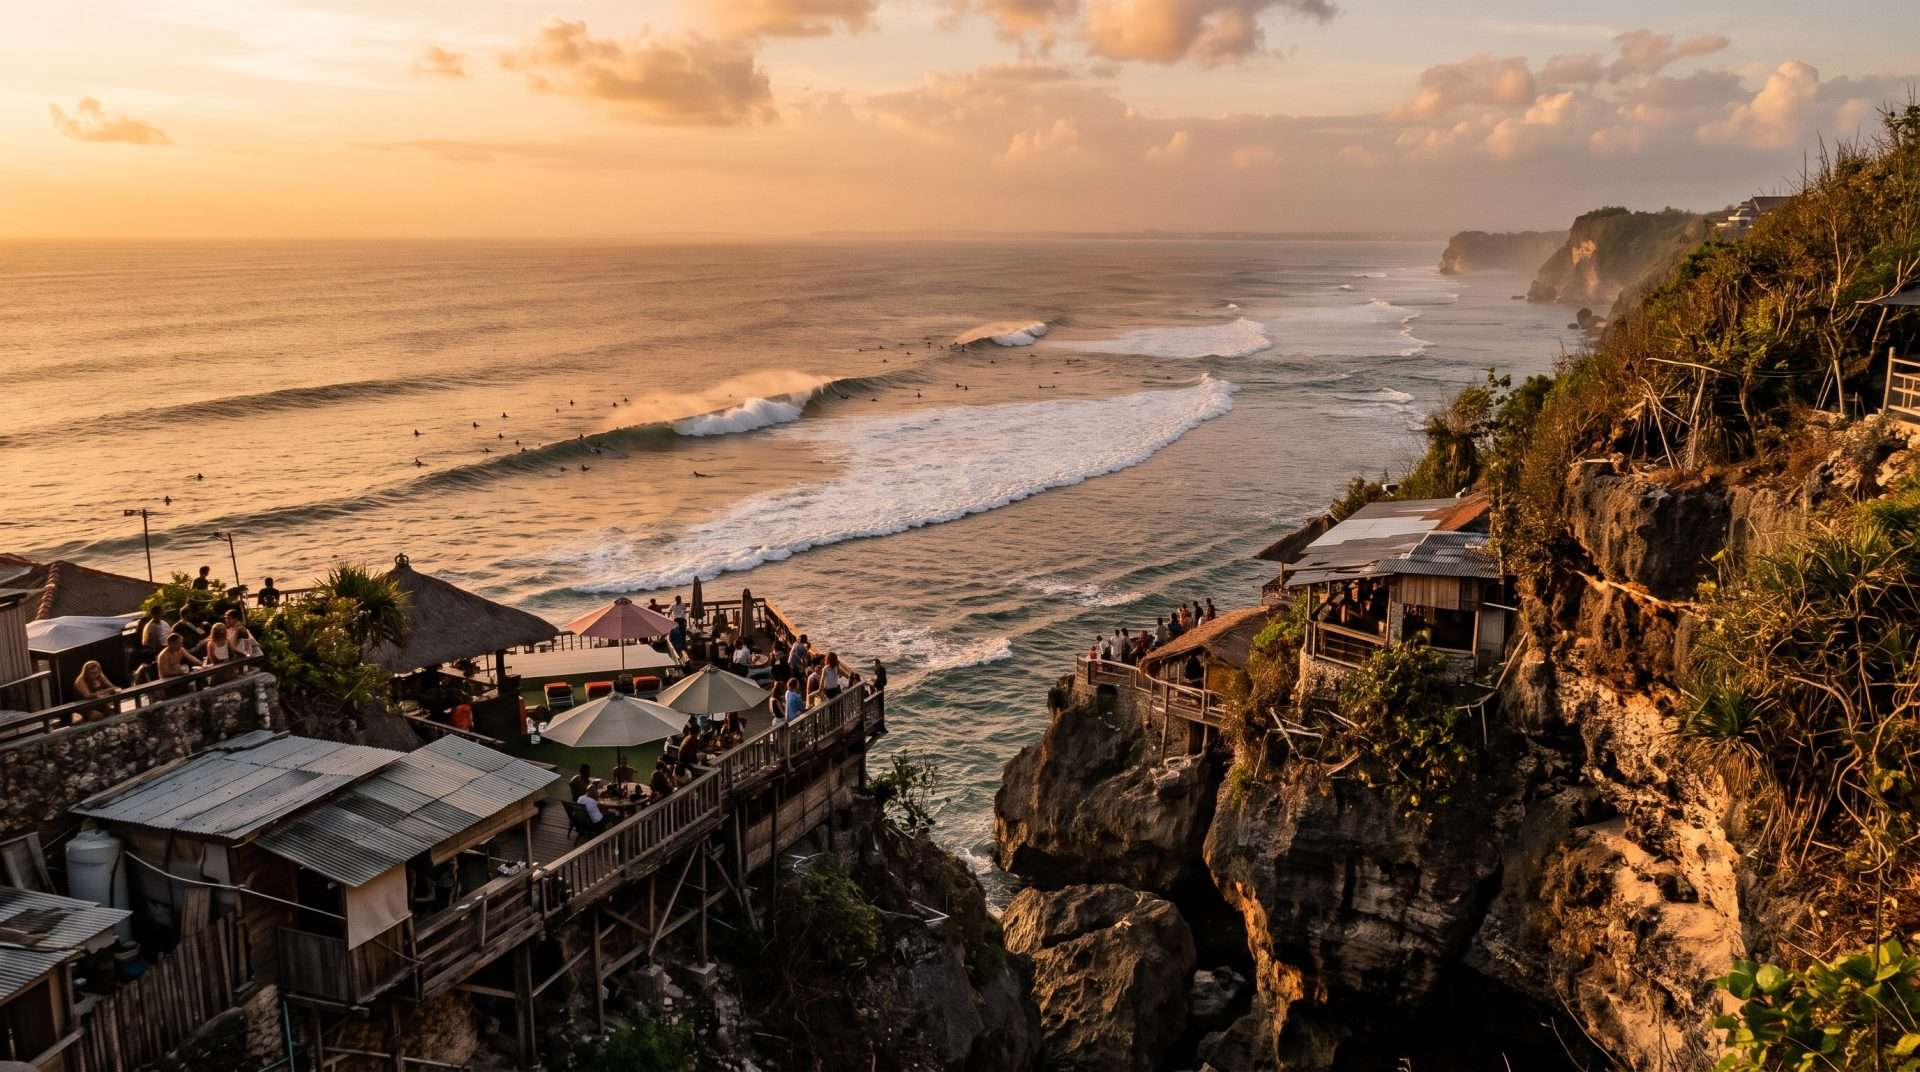
Touchdown at I Gusti Ngurah Rai International Airport (DPS) is an immediate test of operational discipline where unprepared travelers lose two hours to visa queues and pay triple the local rate to aggressive transport touts. Securing your digital paperwork ahead of time and locking in your cliffside transit immediately gets you out of the terminal humidity and onto the limestone edge of the Bukit Peninsula before the evening glass-off.
Destination Reality Check: DPS to Uluwatu
- Best Overall Booking Window: Complete your e-VOA (Electronic Visa on Arrival) and All Indonesia Electronic Customs Declaration 72 hours prior to departure; book private airport transfers or Uluwatu 125cc scooters 48 hours ahead.
- Peak Crowd Hours to Avoid: International arrivals stack up heavily between 1:00 PM and 4:00 PM, while the single arterial road south through Jimbaran bottlenecks with bumper-to-bumper traffic from 4:30 PM to 7:00 PM.
- Primary Transit Tip: Bypass the unofficial drivers crowding the arrivals barrier and walk directly to the air-conditioned Grab Lounge outside the international exit—or pre-book a private car transfer—because Uluwatu has zero public transit and is completely unwalkable.
Ngurah Rai International Airport (DPS) Transit: Clearing Paperwork & Escaping the Touts
The Breakdown
Surviving the DPS arrival sequence starts before you board your flight in your home country, establishing the foundation for the rest of our Only By Land Indonesia overland route. If you are flying in on a oneworld alliance carrier like Malaysia Airlines or Cathay Pacific, leverage your Qatar Airways Privilege Club Gold (Oneworld Sapphire) status at check-in to ensure priority baggage tags are attached to your main hold luggage. Once on the ground in Denpasar, those priority tags mean your bags hit the carousel in the first wave, saving you 30 to 45 minutes of standing in a humid, overcrowded baggage hall. With your pre-paid e-VOA linked digitally to your passport, you bypass the manual payment counters and walk straight to the automated biometric autogates. After grabbing your bags, scan your pre-completed electronic customs QR code at the final checkpoint and brace for the outdoor arrivals concourse, where dozens of independent drivers will immediately angle for your attention.
Why Book This Tour vs. Going Solo
When traveling with a 75cm hard-shell suitcase and a dedicated camera pack, attempting to balance your gear on the floorboards of a local Gojek scooter is a recipe for crushed equipment or a roadside spill on the bypass highway. While solo backpackers can walk past the vocal taxi touts straight into the official Grab Lounge at the end of the international terminal to book a fixed-rate Grab Car, pre-booking a fixed-price private GetYourGuide airport transfer removes the final layer of post-flight friction. Your driver tracks your incoming flight number, waits outside the customs exit with a name board, handles the airport toll gate fees in cash, and loads your heavy cases directly into a Toyota Avanza or Innova without surge pricing or app-connection failures.
Logistics & Mobile Photo Pro-Tips
- Best Time & Lighting: Late morning (10:00 AM to 11:30 AM) or mid-afternoon (3:00 PM to 4:30 PM) arrivals provide bright, directional sunlight that cuts through the overhangs of the outdoor terminal walkways and highlights the carved stone gates.
- The Money Shot: Keep your primary Canon body and heavy lenses locked inside your carry-on pack during transit and pull out the Samsung Galaxy S25 Ultra as you exit customs toward the open-air pick-up pavilion. Switch to the 0.5x ultra-wide lens (13mm equivalent) and angle the frame slightly upward from waist height to capture the traditional Balinese Candi Bentar split gateways integrated into the modern steel canopy of the terminal roof.
- Mobile Pro-Tip: Moving from the freezing air conditioning of the baggage hall into Denpasar’s 85% coastal humidity will instantly fog your smartphone lens array; wipe the S25 Ultra camera rings with a dry microfiber cloth before shooting, and tap-to-expose on the bright sky between the roof beams to prevent clipping the highlights.
- Footwear & What to Wear: Wear breathable slip-on sneakers or trail runners and lightweight ripstop trousers for the flight; the walk from the distant international gates to the immigration autogates is long, and the outdoor waiting zones trap tropical heat.
Booking Details: Ngurah Rai Airport (DPS) Private Transfer to Uluwatu via GetYourGuide | Duration: 1 to 1.5 hours | Cancellation: Free up to 24 hours before | Bali Airport Private Transfer to Uluwatu
Uluwatu Basecamp Setup: Scooter Mobility, Fasting Fuel & Cliffside Surf Compression
The Breakdown
Once your car climbs the limestone elevation of the Bukit Peninsula past Jimbaran, head directly to your guesthouse or villa in the Pecatu or Bingin Beach corridor. Drop the 75cm hard-shell suitcase in your room and immediately transition to two wheels by taking delivery of a reliable 125cc scooter—specifically a Honda Vario or Honda Scoopy—arranged through a verified local provider. Uluwatu is spread across steep, winding ridge roads and single-lane coral alleys flanked by drainage ditches with zero pedestrian sidewalks; without a scooter on Day 1, you are effectively stranded at your accommodation. After fasting through the entire flight and airport transit window, skip the overpriced Western cafes serving sugar-heavy smoothie bowls and ride five minutes along Jalan Labuan Sait to a local roadside warung. Break your fast with a dense, high-protein plate of Nasi Campur piled with shredded chicken, beef rendang, and peanuts, or detour toward a grill stall for Jimbaran-style ikan bakar (charcoal-grilled snapper), ordering three extra fried eggs and fresh sambal matah on the side to replenish your electrolytes and sodium.
Why Book This Tour vs. Going Solo
Renting a random scooter from an unvetted street corner stand in Pecatu often leaves you with bald tires, spongy drum brakes, and no valid vehicle registration (STNK) when traffic police set up checkpoints near the main intersections. Securing a pre-booked scooter delivery or a private half-day Uluwatu cliff driver via GetYourGuide guarantees a mechanically serviced bike delivered directly to your villa gate with two sanitized helmets and a phone mount, or gives you a dedicated local driver who knows the back-alley shortcuts around Bingin while you focus entirely on handling your camera rig. Having your transport locked in by 3:30 PM ensures you reach the cliff edge above Suluban Beach well before the golden hour light drops toward the horizon.
Logistics & Mobile Photo Pro-Tips
- Best Time & Lighting: Arrive at the cliffside terraces above Suluban Beach or the lower decks near Single Fin between 5:00 PM and 6:15 PM, when the low-angle western sun turns the Indian Ocean swell faces into textured gold and darkens the deep-water channels.
- The Money Shot: Now is the time to unpack the heavy glass: pull out the Canon EOS R5 Mark II and mount the RF 500mm f/4L IS USM prime lens to isolate the outer reef break at Bommie and Temples from the high cliff vantage point. The extreme focal length compresses the towering six-to-eight-foot rolling Indian Ocean sets until they stack vertically in the frame, reducing the surfers dropping down the steep faces into razor-sharp, tiny silhouettes against the backlit spray; dial your shutter speed to at least 1/2000s (Auto ISO, f/4 to f/5.6) to freeze every water droplet in the fading light. For quick behind-the-scenes vertical frames on the Samsung Galaxy S25 Ultra, switch to the 5x optical periscope telephoto (115mm equivalent) to compress the layered warung roofs clinging to the cliff face against the whitewater below.
- Mobile Pro-Tip: Salt spray rises surprisingly high up the Suluban cliff face during big southwest swells; keep a UV protective filter on your front element and use the S25 Ultra’s Pro Mode to lock exposure compensation at -0.7 EV so the glittering sun reflections on the water don’t blow out into white blobs.
- Footwear & What to Wear: Wear closed-toe shoes when riding the scooter—never flip-flops on gravelly limestone corners—and bring a dark, neutral t-shirt so you don’t cast bright color reflections onto your viewfinder or glass partitions while shooting from the cliff bars.
Booking Details: Bali Scooter Rental with Helmet & Villa Delivery / Uluwatu Cliff Sunset Transfer via GetYourGuide | Duration: 1 Day to Multi-Day | Cancellation: Free up to 24 hours before | Bali Scooter Rental Delivery or Uluwatu Sunset Tour
Frequently Asked Questions
Can I take a Gojek or Grab scooter directly from inside DPS Airport with a large suitcase?
No, scooter drivers are barred from picking up passengers with full-size 75cm hard-shell luggage, and balancing a rigid case on a motorbike through the Ngurah Rai bypass roundabout is dangerous and illegal. Book a four-wheeled Grab Car from the official lounge or pre-arrange a private car transfer so your luggage and camera cases ride inside a locked trunk.
Do I need to print the Indonesia e-VOA and electronic customs QR code before landing in Bali?
While you can scan the customs QR code directly from your Samsung screen, airport Wi-Fi and roaming eSIM activations frequently stall inside the concrete immigration hall. Save offline screenshots of both your e-VOA PDF and your customs QR code in a dedicated phone album before boarding your flight so you never break stride at the autogates.
What documents are legally required to ride a 125cc scooter in Uluwatu?
Indonesian traffic police require a physical International Driving Permit (IDP) endorsed with a motorcycle stamp alongside your home country license, and you must wear a buckled helmet at all times. If you only hold a standard car license, skip the self-drive scooter rental and book a private car charter or use local Gojek pillion rides once your luggage is stored at your hotel.
How steep are the stairs down to the water at Suluban Beach when carrying a 500mm lens?
The descent from the top parking lot down to the sand cave at Suluban involves over 120 uneven, narrow concrete steps that get slick with seawater at high tide. Keep your Canon EOS R5 Mark II and 500mm prime lens on the upper cliff terraces near Single Fin for the best elevated compression angle rather than hauling long telephoto glass down into the wet cave mouth.
Strategic Itinerary Sequencing: Your First 24 Hours on the Bukit
- Day 1 (1:30 PM – 3:30 PM): Clear the DPS biometric autogates using your pre-registered e-VOA, collect your priority-tagged oneworld checked bag, walk straight past the touts to your pre-booked car or the official Grab Lounge, and ride south across the isthmus to Pecatu.
- Day 1 (3:30 PM – 4:45 PM): Check into your Uluwatu base, take delivery of your 125cc Honda Vario at the property gate, and ride to a local warung on Jalan Labuan Sait to break your transit fast with high-protein Nasi Campur or grilled seafood loaded with extra eggs and sambal.
- Day 1 (5:00 PM – 6:30 PM): Unpack the Canon EOS R5 Mark II and 500mm prime lens, ride five minutes to the Suluban cliff overlook, and shoot compressed telephoto frames of the evening surf glass-off before resting up for our Bali & Lombok Day 2 guide to Uluwatu’s clifftop temples and coastal backroads.








Leave A Comment