

Good picnic food ideas turn simple outdoor gatherings into memorable experiences where people bond over tasty meals. Nothing beats enjoying a feast in nature’s embrace.
The search for easy picnic foods without hours of prep work can feel daunting. The ideal picnic needs a sweet spot between fancy and simple. Italian pressed sandwiches taste even better when they sit longer. Fresh summer treats round out the perfect spread, and simple food choices make a real impact.
The right recipes work magic, whether you’re planning a cozy date, boosting team spirit with a corporate picnic, or getting the family together. A great picnic spread needs both savory bites and sweet endings. The best part? Everything stays easy to pack and stands up to the heat during outdoor adventures.
Caprese Skewers
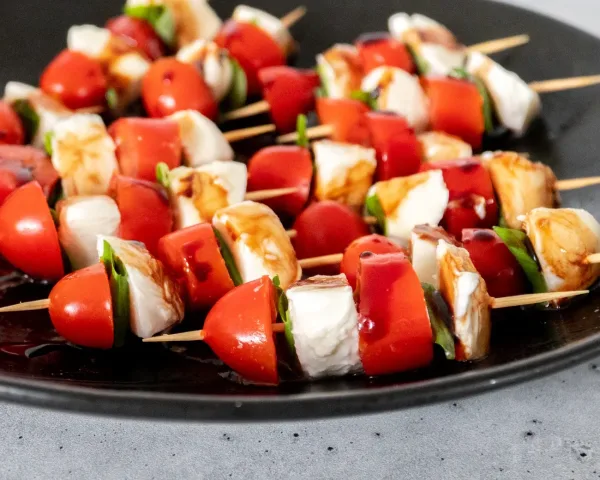
Image Source: It starts with protein –
Caprese skewers pack a classic Italian flavor punch that’s perfect for outdoor dining. These bite-sized treats combine refreshing summer tastes and you don’t need any cooking skills to make them.
Caprese Skewers Key Ingredients
The magic of these skewers comes from their simplicity. You just need a few quality ingredients:
- Cherry tomatoes – Pick firm, ripe ones. Multi-colored varieties will make your presentation pop
- Fresh mozzarella balls – Go for “ciliegine” or “bocconcini” (cherry-sized mozzarella) that match your tomatoes’ size
- Fresh basil leaves – Look for bright green leaves with no brown spots. You can fold larger leaves in half
- Balsamic glaze – Skip regular balsamic vinegar and use the thicker, sweeter reduction
- Extra virgin olive oil – Just a light drizzle does the trick
- Salt and pepper – Fresh ground varieties taste boldest
Why Caprese Skewers Are Great
These skewers make fantastic picnic food and with good reason too. They’re completely foolproof and impossible to mess up, which makes them perfect when you’re in a rush. You can put them together up to 8 hours ahead without dressing and keep them in the fridge until it’s time to serve.
The grab-and-go format means no utensils needed, so there’s less mess at your picnic. Red, white, and green colors make them a feast for the eyes at any outdoor gathering.
Caprese Skewers Prep Time
The best part about this easy picnic food is how quickly you can make it. You’ll need just 5-15 minutes to prepare from start to finish. Assembly couldn’t be simpler – thread a cherry tomato, fold a basil leaf if needed, add a mozzarella ball, another basil leaf, and finish with one more cherry tomato.
You can lift the flavor by letting the mozzarella balls marinate overnight in olive oil with Italian seasoning. But even without this extra step, these skewers pack such amazing flavors that they’ll become your go-to picnic food choice.
Chicken Salad Croissant Sandwiches
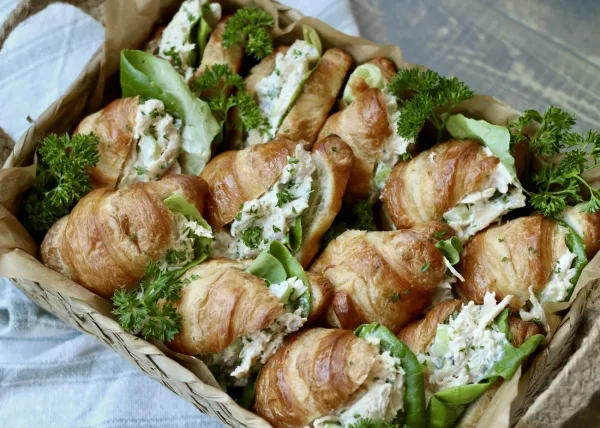
Image Source: southernprotea.com
Buttery croissants filled with creamy chicken salad make the perfect picnic sandwich. These tasty handheld treats pack protein-rich nourishment that stays fresh during outdoor adventures.
Chicken Salad Croissant Key Ingredients
A great chicken salad croissant sandwich needs quality ingredients that blend well together:
- Chicken base: Pre-cooked or rotisserie chicken, shredded or finely chopped
- Creamy binding: Mayonnaise (½ cup) or a mix of mayo and Greek yogurt for a lighter texture
- Crunch elements: Finely diced celery (2-3 stalks), chopped nuts (optional), diced red onion (¼ cup)
- Sweet touches: Halved grapes (½-1 cup) or dried cranberries
- Flavor enhancers: Dijon mustard (1-2 tbsp), lemon juice, salt, pepper, garlic powder
- Fresh herbs: Chopped dill or parsley to add brightness
- Delivery vehicle: Fresh buttery croissants, sliced horizontally
Why Chicken Salad Croissants Work
Chicken salad croissant sandwiches stand out as picnic food because they travel well. The flavors blend better when prepared 4-6 hours ahead or even overnight.
The buttery croissants lift this simple chicken salad into something special. These sandwiches fit perfectly at picnics that need heartier options. The protein-packed filling keeps everyone satisfied, and you won’t need any utensils.
On top of that, chicken salad’s versatility lets you customize the recipe. You can stick to classic combinations with celery and grapes or try something new with dried fruits and nuts.
Chicken Salad Croissant Prep Time
The best part about this picnic food is how quick it comes together. The whole sandwich takes just 10 minutes to make with no cooking needed. Pre-cooked chicken means you just mix and assemble.
Keep the chicken salad in a separate airtight container for picnics – it lasts 3-4 days in the fridge. Put the sandwiches together at your picnic spot to keep those croissants crispy. This simple approach will give you fresh, delicious sandwiches that make outdoor dining special.
Pressed Italian Sandwiches
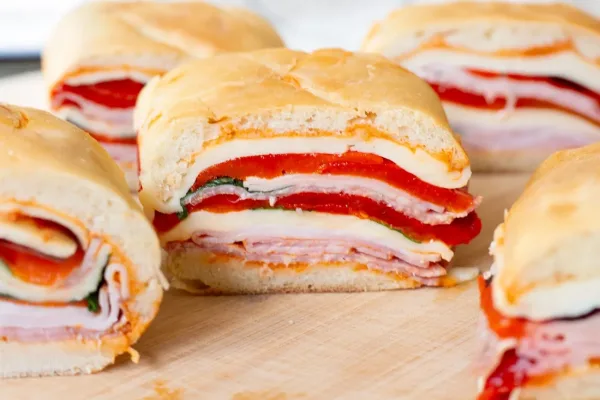
Image Source: Botticelli Foods
The beauty of pressed Italian sandwiches comes from layering delicious ingredients that blend together under pressure over time. Simple ingredients turn into a travel-friendly masterpiece that gets better as it sits.
Pressed Italian Sandwich Ingredients
You need quality ingredients to make the perfect pressed sandwich:
- Bread base: Ciabatta loaf or rosemary bread (10-12 inches) makes a sturdy foundation
- Meats: Prosciutto, salami, capocollo, or sopressata—you’ll need 10-12 ounces total
- Cheese options: Fresh mozzarella, provolone, or goat cheese
- Spreads: Olive tapenade (1/2 cup) or pesto (1/4 cup)
- Vegetables: Roasted red peppers, artichoke hearts, spinach/arugula, and basil leaves
- Dressing: Balsamic vinegar (2 tbsp), olive oil (2 tbsp), and seasonings
Why Pressed Sandwiches Are Ideal
Pressed sandwiches stand out from other picnic foods because they taste better with time. The pressing process blends flavors together and keeps everything intact during transport. Weight compresses the sandwich, which creates neat portions that stay together.
These sandwiches are not just portable – you can make them up to 24 hours ahead. Their versatility lets you customize based on your priorities—vegetarians can swap grilled vegetables for meats.
Pressed Sandwich Prep Time
The assembly takes about 15-20 minutes, plus pressing time. Start by layering ingredients between bread halves. Wrap everything tightly in plastic wrap. Place a heavy object (cast iron skillet, bricks, or kettle ball) on top to compress.
Let it chill for at least 6 hours, though overnight pressing (8+ hours) gives the best results. You can make this impressive picnic food a day before your outing, which cuts down preparation time by a lot.
Ham and Cheese Pinwheel Wraps
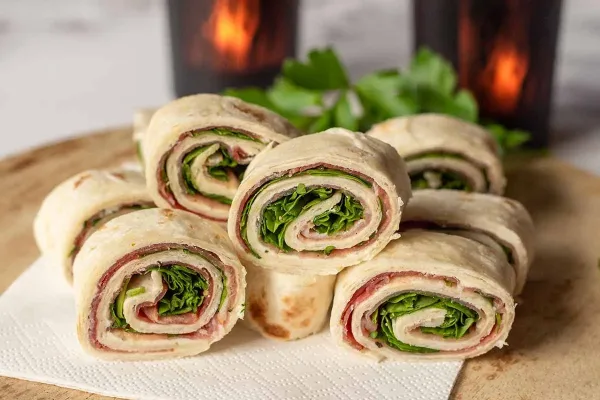
Image Source: The Tasty Chili
Ham and cheese pinwheel wraps pack amazing flavors in small bites that everyone loves at outdoor gatherings. These rolled treats need no cooking and look great as picnic food.
Pinwheel Wrap Ingredients
Ham and cheese pinwheels combine a few ingredients that create delicious results:
- Base spread: Softened cream cheese (8 oz) mixed with ranch seasoning packet
- Protein: Thinly sliced deli ham (3-4 slices per wrap)
- Cheese options: Shredded cheddar, provolone, Swiss, or Colby Jack
- Tortillas: Flour tortillas (burrito-size works best)
- Optional add-ins: Green onions, bell peppers, baby spinach, or pickles
Why Pinwheels Are Perfect for Picnics
These pinwheels stand out as great picnic food because they stay fresh and crisp – unlike regular sandwiches that get soggy outdoors. The wrapped structure helps them keep their shape during transport.
You can make these treats up to 24 hours ahead, which lets the flavors blend perfectly. Their handy size means you won’t need any utensils, making cleanup easier after your picnic.
Pinwheel Wrap Prep Time
You’ll need about 10 minutes of hands-on time to make these picnic favorites. Here’s how to put them together:
- Mix cream cheese with seasonings until smooth
- Spread mixture onto tortillas, leaving a small border
- Layer ham and cheese evenly
- Roll tightly from edge to edge
- Chill 1-2 hours before slicing into 1-inch rounds
The chilling step helps set the filling and creates neat pinwheel slices that stay together well.
Vegetarian Rainbow Wraps
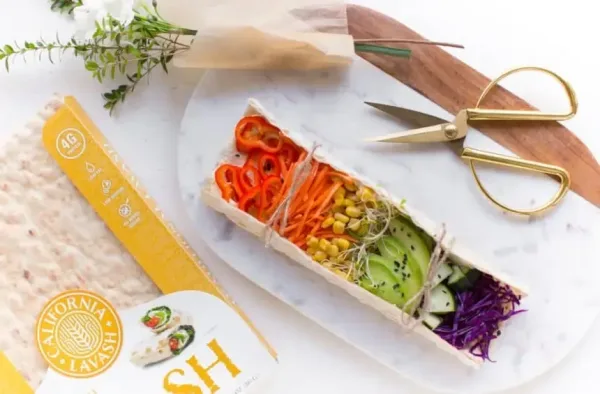
Image Source: World of Vegan
These colorful vegetarian rainbow wraps turn basic ingredients into nutritious bundles that work great for outdoor dining. Your tortilla creations will show off nature’s colors and give you a fresh twist on typical picnic food.
Rainbow Wrap Ingredients
The magic of these wraps comes from their layers of colorful vegetables:
- Base: Large tortillas (whole wheat, gluten-free, or spinach-flavored)
- Spread: 2 tablespoons hummus per wrap (works as tasty “glue”)
- Red layer: Bell peppers, tomatoes, or radishes
- Orange/Yellow: Carrots (shredded), corn, yellow bell peppers
- Green: Spinach, cucumber, avocado (skip if making ahead)
- Purple: Red cabbage (adds a nice crunch)
You can add beans for extra protein or use herbed cream cheese instead of hummus.
Why Rainbow Wraps Are a Hit
These wraps stand out from other picnic foods because they look amazing and let you “eat the rainbow.” Each wrap packs 2-3 servings of vegetables, making them a healthy choice.
Kids love these wraps because the bright colors make eating veggies fun. Research shows that kids who help make meals tend to eat what they create. This makes rainbow wraps a great way to get the whole family involved in picnic prep.
Rainbow Wrap Prep Time
You’ll need just 10 minutes to put these together, which fits right into quick picnic food planning. Here’s how simple it is:
- Spread hummus across the tortilla
- Arrange vegetables in colorful rows
- Roll tightly, tucking in ends
- Slice into pinwheels (optional)
Want to make them ahead? Just prep your ingredients separately and keep them in the fridge until you’re ready to assemble. Rainbow wraps look amazing and take no time to make.
Greek Orzo Salad
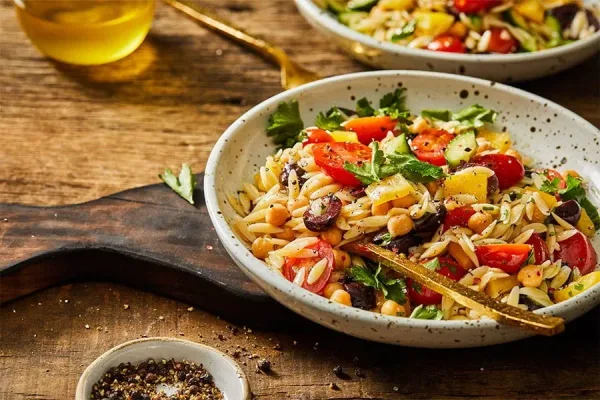
Image Source: DeLallo
A Greek orzo salad with Mediterranean flavors combines tiny rice-shaped pasta and fresh vegetables. This refreshing picnic dish handles outdoor temperatures well. The vibrant mix delivers bold flavors without much effort.
Greek Orzo Salad Ingredients
The versatile picnic dish revolves around these essential ingredients:
- 1½ cups uncooked orzo pasta
- Cucumber (English or Persian preferred for crispness)
- Cherry tomatoes, halved
- Red onion, finely chopped
- Crumbled feta cheese (½-1 cup)
- Kalamata olives, halved
- Fresh herbs (parsley, mint, or basil)
- Simple dressing: olive oil, red wine vinegar, lemon juice, oregano, and garlic powder
Why Greek Orzo Salad Works
This easy picnic food runs on the outdoors because it tastes better after sitting. The flavors develop more as ingredients mingle. You’ll find it disappears first at any gathering. The salad contains no mayo and stays food-safe without refrigeration for several hours.
Greek Orzo Salad Prep Time
This simple picnic dish needs just 15 minutes of active preparation. Cook orzo according to package directions until tender (6-10 minutes). While it cooks, chop vegetables and whisk dressing ingredients. The total time including cooling takes about 25 minutes.
Watermelon Feta Salad
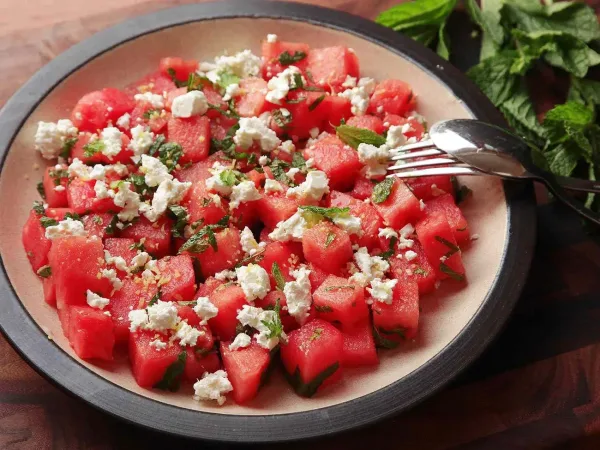
Image Source: Serious Eats
A perfect picnic side dish combines sweet watermelon with tangy feta cheese to balance contrasting flavors at hot summer gatherings. The unexpected pairing delivers both hydration and satisfaction.
Watermelon Feta Salad Ingredients
This summer favorite needs just a few simple ingredients that create amazing results:
- Watermelon: 4-8 cups cubed or melon-balled seedless watermelon
- Feta cheese: ½-1 cup crumbled or cubed
- Fresh mint: 2-4 tablespoons chopped
- Cucumber: Persian or English varieties work best
- Red onion: Thinly sliced, about ¼ cup
- Simple dressing: Combination of olive oil, lime/lemon juice, honey, salt and pepper
You can add arugula, black olives, or basil to create additional flavor dimensions.
Why Watermelon Feta Salad Is Refreshing
The magic of this easy picnic dish comes from its perfect flavor balance. Note that watermelon’s high water content makes it naturally hydrating on hot days. Sweet juiciness meets salty feta to create a sophisticated yet approachable taste combination.
The salad needs no cooking, which makes it perfect for sweltering summer days. Unlike mayo-based salads, this dish stays food-safe at outdoor temperatures.
Watermelon Feta Salad Prep Time
This simple picnic favorite comes together in just 10-15 minutes from start to finish. You’ll spend time cubing watermelon, slicing cucumber, chopping herbs, and whisking dressing ingredients. Of course, you can prepare the dish ahead and refrigerate it for 1-3 hours so the flavors develop fully.
The salad tastes best when stored in a chilled container and gently tossed before serving at picnics.
Pesto Pasta Salad
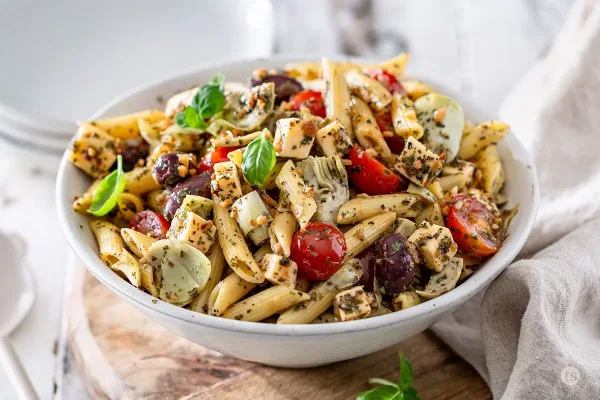
Image Source: Delicious Dish Blog – Tastefully Simple
Pesto pasta salad is a crowd favorite that brings fresh herbal flavors to any outdoor meal. You can easily adapt this versatile dish based on what you have in your kitchen, and it’s a great alternative to mayo-based salads.
Pesto Pasta Salad Ingredients
This easy picnic food has these basic ingredients:
- Pasta: Short, textured varieties like fusilli, rotini, penne, or farfalle work best to hold the sauce
- Pesto: You’ll need about ⅔ cup, homemade or store-bought, made with:
- Fresh basil (mix with parsley for an interesting twist)
- Pine nuts or budget-friendly pepitas
- Extra virgin olive oil, lemon juice, garlic, salt
- Add-ins: Cherry tomatoes (halved), baby arugula or spinach
- Cheese options: Crumbled feta, mozzarella balls, or Parmesan
- Optional: Kalamata olives, chickpeas, cucumber
Why Pesto Pasta Salad Is a Classic
This picnic favorite shines because it travels so well. We love that it stays fresh longer outdoors than mayo-based salads. You can keep it in the fridge for up to 4 days. The flavors blend and get even better over time.
Pesto Pasta Salad Prep Time
You can whip up this dish in about 20-25 minutes. Here’s what you need to do:
- Cook pasta just past al dente so it won’t harden when cool
- Save some pasta water before draining
- Rinse pasta under cold water
- Mix in your pesto and add-ins
- Chill until serving time
This bright and adaptable dish makes every picnic better.
Cucumber Avocado Salad
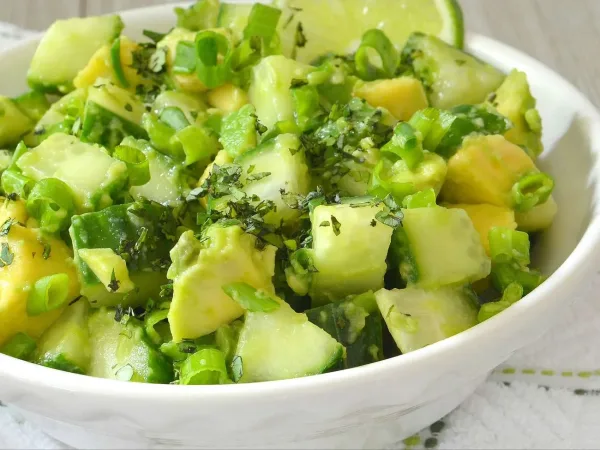
Image Source: Allrecipes
A refreshing salad emerges when crisp cucumber meets creamy avocado. The combination stays appealing even during long outdoor gatherings and delivers vibrant flavors with contrasting textures.
Cucumber Avocado Salad Ingredients
This picnic-friendly recipe needs just a few simple ingredients:
- English cucumber – The thin skin and minimal seeds make it perfect when sliced thinly
- Ripe avocados – Look for ones that yield slightly to pressure but aren’t mushy
- Red onion – Sharp flavors come from thin slices
- Fresh herbs – Brightness comes from dill, cilantro, or basil
- Citrus juice – Fresh lime or lemon keeps avocados green
- Olive oil – Extra virgin brings the best flavor
- Optional additions – Add feta cheese, cherry tomatoes, or jalapeños if you want extra kick
Why Cucumber Avocado Salad Is Cooling
The salad runs on cucumber’s high water content, which makes it naturally hydrating. The avocado’s creaminess satisfies without weighing you down. Your warm-weather gatherings will benefit from this mayo-free salad that stays food-safe longer than traditional options.
Cucumber Avocado Salad Prep Time
You’ll need just 10 minutes to put this together. Start by slicing the vegetables. Next, whisk the dressing ingredients and combine everything gently. The salad tastes best after a brief chill in the refrigerator or when transported in a cool container.
Mini Quiche Cups

Image Source: Eggland’s Best
Mini quiche cups pack savory, protein-rich flavors that taste great at outdoor gatherings. You can create countless flavor combinations in these pastry cups with minimal hands-on prep time.
Mini Quiche Cup Ingredients
You’ll need these simple ingredients to make these portable treats:
- Pie crust – Store-bought or homemade shortcrust pastry
- Eggs – You’ll need 4 eggs per cup of milk
- Dairy – Mix milk and heavy cream (or use half-and-half)
- Salt and pepper – Just the right amount to season
- Filling options:
- Bacon and Swiss cheese with green onions
- Ham and cheese
- Spinach and red bell pepper
- Mushroom and cheese
Why Mini Quiches Are Handy
These bite-sized quiches make excellent picnic food because they taste great hot or cold. You can make them ahead of time and freeze them for up to 2 months. The best part? They reheat beautifully – just pop them in a 400-degree oven for 5-10 minutes straight from the freezer.
Mini Quiche Cup Prep Time
The total prep spans about 3 hours, but most of it is hands-off time. You’ll spend only 20-25 minutes actively preparing them, and they bake for 25-30 minutes. This makes them perfect for quick picnic food prep. Want an even faster option? Try pre-made phyllo cups or skip the crust altogether.
Cheese and Pesto Whirls
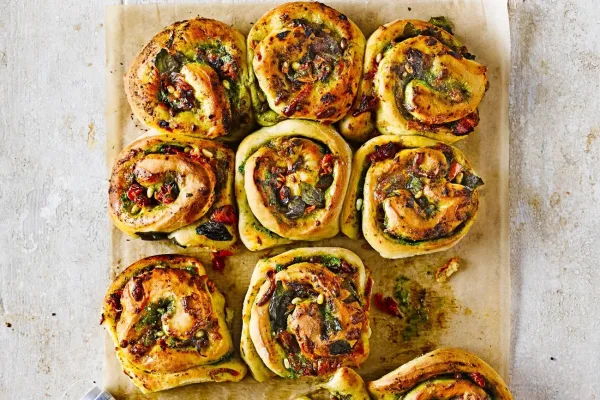
Image Source: BBC Good Food
These delicious puff pastry spirals come filled with herby pesto and melted cheese. Your picnic guests will love these savory swirls that taste amazing whether served warm or at room temperature.
Cheese Pesto Whirl Ingredients
You’ll need just a few quality ingredients to make these tasty picnic treats:
- Puff pastry sheets (store-bought works perfectly)
- Fresh green pesto (150g pot or homemade)
- Grated cheese (mozzarella, Parmesan, or four-cheese mix)
- Optional additions: garlic powder, chives, sun-dried tomatoes
Why Cheese Whirls Are Crowd-Pleasers
These cheese and pesto whirls disappear from the picnic basket quickly. Their spiral shape makes them perfect to eat without any utensils. The flaky bites taste great warm and maintain their delicious flavor at room temperature during outdoor gatherings.
Cheese Pesto Whirl Prep Time
You can make these picnic treats in about 20 minutes of active preparation. Here’s what you need to do:
- Roll out puff pastry and spread with pesto
- Sprinkle cheese liberally across surface
- Roll tightly into sausage shape
- Cut into ½-inch slices
- Bake 10-12 minutes until golden
The whirls freeze well after cooling, so you can make them ahead. Fresh-baked whirls right before your picnic will fill the air with an irresistible aroma that draws everyone near.
Scotch Eggs
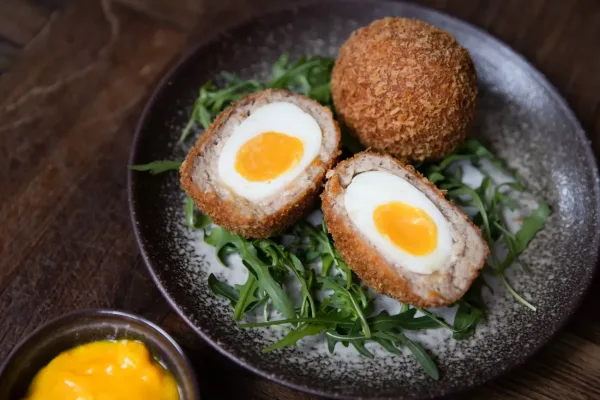
Image Source: Athenaeum Hotel
British Scotch eggs lift any picnic basket with their distinctive blend of soft-boiled eggs wrapped in seasoned sausage meat. These portable delights don’t actually originate from Scotland, despite what their name suggests.
Scotch Egg Ingredients
The classic recipe needs:
- Large eggs (typically 4-8)
- Sausage meat (1-1.5 pounds) or sausage links with casings removed
- Flour for dredging
- Beaten eggs for coating
- Breadcrumbs or panko for the crispy exterior
- Seasonings like mustard, nutmeg, herbs, and Worcestershire sauce
Why Scotch Eggs Are a Picnic Staple
Scotch eggs have become a picnic favorite because they taste great hot or cold. These protein-rich treats need no utensils and travel well at room temperature. The halved presentation creates an eye-catching display that shows off the contrasting layers of egg, meat, and crispy coating.
Scotch Egg Prep Time
The preparation of Scotch eggs takes about 35 minutes. You’ll need to soft-boil the eggs for 6-7 minutes to achieve jammy centers, cool and peel them carefully. Each egg gets wrapped in seasoned sausage meat, then coated with flour, egg wash, and breadcrumbs before frying for 5-6 minutes. These tasty treats can be made ahead and stored in the refrigerator, which makes picnic planning easier.
Hummus and Veggie Cups
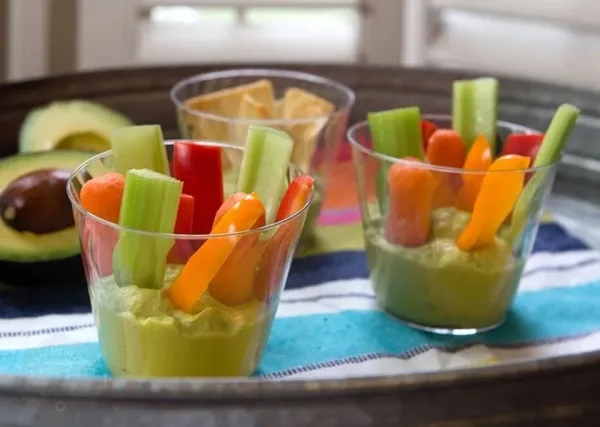
Image Source: California Avocados
Individual hummus veggie cups can change your typical dip platters into perfectly portioned picnic treats that combine nutrition and convenience. These customizable containers solve the problem of communal dipping at outdoor gatherings.
Hummus Veggie Cup Ingredients
You’ll need these items to create portable snacks:
- Hummus (store-bought or homemade) made from chickpeas, tahini, olive oil, lemon juice, and garlic
- Crisp vegetables cut into sticks: carrots, cucumber, bell peppers, celery, green beans
- Small food-safe containers (shot glasses, plastic cups, or mini pots)
- Optional garnishes: roasted red pepper strips, herbs, lemon-flavored olive oil
Why Hummus Cups Are Healthy
These nutrient-dense picnic bites pack several health benefits. Each quarter cup of hummus contains 3.6 grams of protein and 3.2 grams of fiber. The chickpea base provides folate, iron, phosphorus, and B vitamins. The unsaturated fats from tahini and olive oil help improve cholesterol levels and support heart health. Unlike typical calorie-dense dips, hummus with vegetables offers a nutritious option that helps bridge the “fiber gap” in many diets.
Hummus Veggie Cup Prep Time
Simple foods often leave lasting impressions—these cups need just 10 minutes to prepare. You can refrigerate and serve them within an hour for the best taste. Well-prepared cups make healthy eating convenient and appealing.
Tzatziki with Pita Chips
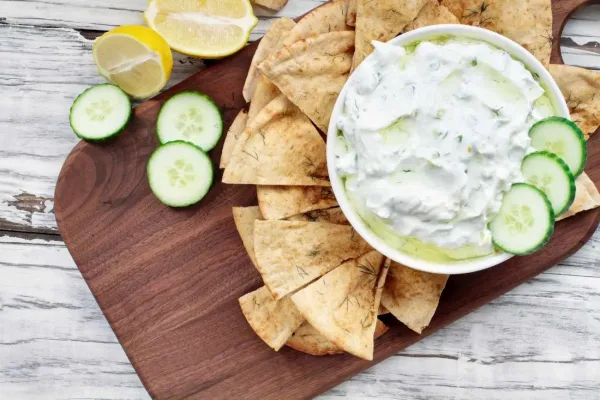
Image Source: Zulay Kitchen
A creamy Greek tzatziki with crispy pita chips makes a perfect picnic dip that holds up well outdoors. This yogurt-based dip from Greece and the Middle East adds a cool contrast to warm summer gatherings.
Tzatziki Dip Ingredients
You’ll need these basic ingredients to make authentic tzatziki:
- Greek yogurt (full-fat or 2%) – forms the creamy base
- English cucumber – grated and drained to keep dip thick
- Fresh garlic (1-5 cloves) – add to your taste
- Dill or mint – gives a bright flavor
- Lemon juice or white wine vinegar – adds the right tang
- Extra virgin olive oil – boosts flavor and texture
- Salt – brings everything together
Why Tzatziki Is a Cool Choice
This Mediterranean dip works great for picnics because its flavors get better over time. The dip tastes best when you let it sit for 30 minutes to several hours before serving. Unlike mayo-based options, tzatziki stays fresh longer outdoors.
Tzatziki Prep Time
You can whip up tzatziki in just 10 minutes of hands-on time. The steps are simple – grate the cucumber and squeeze out the water, then mix everything together. This quick-fix dip is one of the quickest ways to make an impressive picnic dish that’s accessible to more people.
No-Bake Chocolate Peanut Butter Bars
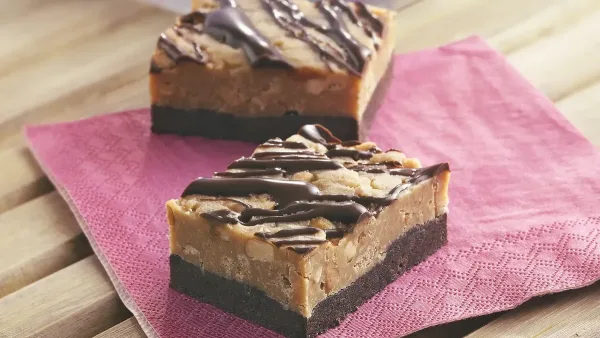
Image Source: Betty Crocker
A delightful combination of rich chocolate and creamy peanut butter makes these picnic treats irresistible. The best part? You don’t need to turn on your oven. These bars taste just like your favorite Reese’s peanut butter cups and come together quickly for any outdoor event.
No-Bake Bar Ingredients
The magic happens with just five basic items:
- Butter – This holds everything together, and you can use salted or unsalted
- Graham cracker crumbs – You’ll need about 8 full sheets to make 1 cup
- Peanut butter – The star of both layers works best with creamy varieties like Skippy
- Powdered sugar – This sweetens and helps the bars set up nicely
- Chocolate chips – Semi-sweet creates the perfect balance with the sweet peanut butter layer
Why These Bars Are a Sweet Win
These chocolate peanut butter bars make perfect picnic companions because they freeze so well. Unlike other desserts that might melt or crumble, these treats stay firm and travel beautifully after proper chilling. You might want to make a double batch since they tend to vanish quickly at gatherings.
No-Bake Bar Prep Time
The active prep takes just 10 minutes from start to finish. Let them chill for about 90 minutes until they’re properly set. You can make them the night before your picnic to save time and reduce stress. After chilling, cut them into squares of any size you like, and you’ll have the perfect portable dessert for your outdoor feast.
Peach Cobbler Bars
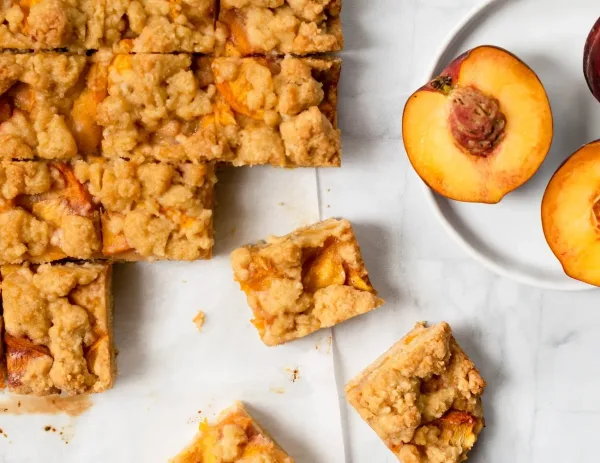
Image Source: Honey Blonde
These summery peach cobbler bars reshape the scene of classic Southern desserts into convenient, portable treats. The buttery, fruit-filled squares pack seasonal sweetness into a hand-held format perfect for outdoor adventures.
Peach Cobbler Bar Ingredients
The recipe needs:
- 2½ cups all-purpose flour
- 1-1½ cups sugar (split between crust and filling)
- ½ cup old-fashioned oats to add texture
- 1 cup cold butter, cut into pieces
- 1 large egg
- Fresh peaches (about 6 large peaches or 5 cups chopped)
- Warm spices: cinnamon, nutmeg
- ¼ teaspoon almond extract to improve peach flavor (optional)
- 2-3 tablespoons cornstarch to thicken juicy peaches
- Fresh lemon juice and zest
Why Peach Bars Are Picnic-Perfect
The bars stand out as an excellent outdoor treat because they slice into precise portions without needing utensils. They maintain their shape during transport, unlike traditional peach cobbler. The bars stay fresh in the refrigerator for 2-3 days, which makes them great for planning ahead. They taste delicious warm or at room temperature – a perfect match for varying picnic conditions.
Peach Cobbler Bar Prep Time
The recipe takes about 15-20 minutes of active kitchen time. The crumbly base/topping comes together with a quick mix of dry ingredients. Next, the peach filling combines fruit, spices, sugar, and cornstarch. The final step layers everything in the pan. Baking takes around 35 minutes, making these bars a quick option among fruit-based picnic desserts.
Watermelon Mint Lemonade

Image Source: Just a Little Bit of Bacon
A delightful watermelon mint lemonade serves as the perfect drink for outdoor dining. Sweet fruit and zesty citrus blend together in this vibrant pink beverage that adds a beautiful finishing touch to any alfresco meal.
Watermelon Lemonade Ingredients
You’ll need these fresh ingredients to make this cooling drink:
- 6 cups seedless watermelon, cubed
- 1 cup fresh lemon juice (about 4-8 lemons)
- ½-¾ cup sweetener (agave syrup, sugar, or xylitol)
- ½ cup loosely packed fresh mint leaves
- 2-4 cups water
- Ice cubes for serving
You can add lemon slices as garnish or 6 oz of rum to create an adult version.
Why This Lemonade Is So Refreshing
This lemonade stands out from other picnic drinks because ripe watermelon’s natural sweetness reduces the need for added sugar. Watermelon’s high water content makes it perfect for hot weather gatherings. A subtle hint of mint creates a cooling effect without overwhelming the fruit’s delicate flavor.
Watermelon Lemonade Prep Time
The entire process takes just 15 minutes. You simply blend the watermelon until smooth, strain it through a fine mesh sieve, and mix it with fresh lemon juice, mint-infused simple syrup, and water. The components can be prepared separately and combined right before your picnic. Just store everything in a chilled container.
Berry Lime Iced Tea

Image Source: WTOP
Berry lime iced tea combines fruity sweetness with citrus tang to create the perfect picnic drink. This refreshing blend mixes antioxidant-rich berries with zesty lime that everyone will love at outdoor gatherings.
Berry Lime Tea Ingredients
You’ll need these items to make this picnic-friendly drink:
- 4 berry-hibiscus herbal tea bags (such as Celestial Seasonings Red Zinger)
- 4-6 cups water
- Fresh lime juice (about ¼ cup)
- Lime slices for garnish
- Simple syrup (½ cup) made from sugar, water, and vanilla extract
- Frozen raspberries (8-10) to add flavor and serve as ice cubes
- Optional additions: orange wedges to enhance citrus notes
Why Berry Lime Tea Is a Crowd Favorite
This drink stands out among picnic options because it contains natural antioxidants from berries, making it a healthier choice. The blend of mixed berries with tea creates an unmatched flavor experience that most people enjoy. The recipe’s flexibility lets you experiment – try raspberry jam with black tea or strawberry jam with mint tea. Your guests will appreciate this interesting non-alcoholic option that isn’t overly sweet.
Berry Lime Tea Prep Time
Berry lime iced tea takes 15-40 minutes to prepare plus cooling time. Steep tea bags in simmering water for 5 minutes. The tea needs to cool completely – about 1 hour. The tea base can be prepared the night before your picnic. The raspberry-infused version requires processing berries with sugar and lime juice until smooth, then straining through a fine sieve.
Comparison Table
| Food Item | Prep Time | Main Ingredients | Storage/Transport Notes | Key Benefits/Features |
| Caprese Skewers | 5-15 mins | Cherry tomatoes, mozzarella balls, basil leaves, balsamic glaze | Assembly possible 8 hours ahead | Needs no cooking, eat without utensils |
| Chicken Salad Croissants | 10 mins | Rotisserie chicken, mayo, celery, grapes, croissants | Stays fresh 3-4 days in fridge | Tastes best after 4-6 hours |
| Pressed Italian Sandwiches | 15-20 mins | Ciabatta, prosciutto, cheese, olive tapenade | Make a day ahead | Gets better with time, travels easily |
| Ham and Cheese Pinwheels | 10 mins | Tortillas, cream cheese, ham, shredded cheese | Make a day ahead | Stays crisp, eat without utensils |
| Greek Orzo Salad | 15 mins | Orzo pasta, cucumber, tomatoes, feta, olives | Flavors blend over time | Safe without cooling, no mayo |
| Watermelon Feta Salad | 10-15 mins | Watermelon, feta cheese, mint, cucumber | Keep chilled | Refreshing, ready to serve |
| Hummus Veggie Cups | 10 mins | Hummus, fresh vegetables, garnishes | Chill up to 1 hour | Personal portions, no shared dipping |
| No-Bake Chocolate PB Bars | 10 mins | Butter, graham crackers, peanut butter, chocolate | Freezes well, sets in 90 mins | Ready without baking, travels chilled |
| Watermelon Mint Lemonade | 15 mins | Watermelon, lemon juice, mint, sweetener | Keep chilled | Natural sweetness, hydrating |
| Berry Lime Iced Tea | 15-40 mins | Berry tea bags, lime juice, simple syrup, berries | Prepare night before | Rich in antioxidants, alcohol-free |
Enjoy Picnic Food Ideas
A picnic gives everyone the perfect chance to savor delicious food and bond with loved ones outdoors. Traditional outdoor dining used to need lots of preparation time. These 27 quick recipes prove you can create impressive flavors in less than 30 minutes of prep time.
These picnic foods cater to different priorities and dietary needs. Caprese skewers, pressed Italian sandwiches, and Greek orzo salad make filling main courses. No-bake chocolate peanut butter bars and peach cobbler bars add sweetness without much effort. Watermelon mint lemonade and berry lime iced tea create that perfect picnic atmosphere.
Recipe flavors get better with advance preparation. Pressed Italian sandwiches and pinwheel wraps stay fresh during transport and look amazing when served. Rainbow wraps and cucumber avocado salad add nutritious, colorful alternatives to classic picnic dishes.
Food safety plays a crucial role in outdoor gatherings. These recipes skip ingredients that don’t hold up well in warm weather. Watermelon feta and Greek orzo salads stay fresh longer without refrigeration since they don’t use mayonnaise.
Anyone can turn a simple outing into an amazing culinary adventure with these impressive yet simple recipes. Hosts can spend less time in the kitchen and more time making memories with friends and family outdoors. Your next gathering just needs a blanket, basket, and these quick-prep foods to create the perfect picnic memory.
FAQs
Q1. What are some quick and easy picnic food ideas that can be prepared in under 30 minutes? Some quick picnic foods include Caprese skewers, chicken salad croissants, ham and cheese pinwheels, Greek orzo salad, and no-bake chocolate peanut butter bars. These can all be prepared in 30 minutes or less and travel well for outdoor dining.
Q2. How can I create a balanced picnic menu that caters to different tastes? A balanced picnic menu should include a mix of proteins, salads, fruits, and desserts. Consider options like pressed Italian sandwiches, watermelon feta salad, vegetarian rainbow wraps, and peach cobbler bars. Don’t forget refreshing drinks like watermelon mint lemonade or berry lime iced tea.
Q3. What are some food safety tips for outdoor dining? Choose foods that don’t spoil quickly in warm weather. Avoid mayo-based salads and opt for vinaigrette-based ones instead. Keep perishable items in a cooler with ice packs. Bring hand sanitizer and disposable wipes for easy cleanup.
Q4. Are there any make-ahead picnic foods that actually taste better with time? Yes, several picnic foods improve with time. Pressed Italian sandwiches develop richer flavors as they sit. Greek orzo salad and pesto pasta salad taste better after the ingredients have had time to meld. Prepare these items the night before for best results.
Q5. What are some vegetarian-friendly picnic options? Vegetarian-friendly picnic options include hummus and veggie cups, cucumber avocado salad, cheese and pesto whirls, vegetarian rainbow wraps, and Caprese skewers. These dishes are not only meat-free but also colorful, nutritious, and easy to prepare.













Leave A Comment