

The selfie has transformed the way we capture moments in our daily lives. What started as a simple self-portrait has evolved into an art form that billions of people practice every single day around the world. Whether you want to share memories with friends on social media or simply document your personal journey, knowing how to take a good selfie makes all the difference.
Taking a great selfie might seem simple at first glance. You pull out your phone, point the camera at your face, and tap the screen. But anyone who has tried knows there is more to it than meets the eye. The difference between an average selfie and one that truly captures your best side involves understanding lighting, angles, camera settings, and composition.
This comprehensive guide will show you everything you need to know about taking selfies that you will actually want to share. From basic techniques to advanced tips used by professional photographers, you will learn practical skills you can apply the very next time you reach for your phone camera.
The digital age has made photography accessible to every person with a smartphone. No longer do you need expensive equipment or professional training to create images that look amazing. With the right knowledge and a bit of practice, anyone can master the art of the selfie and capture photos that showcase their personality and style.
Understanding Selfie Basics: What Makes a Great Self-Portrait
Before diving into specific techniques, it helps to understand what separates an exceptional selfie from a mediocre one. The foundation of any good photo comes down to a few essential elements that work together to create a compelling image.
Light plays the most crucial role in photography. The way light hits your face determines how features appear in the final photo. Natural light tends to be most flattering, creating soft shadows that add dimension without harsh contrasts. Artificial light sources can work well too, but they require more careful positioning to avoid unflattering effects.
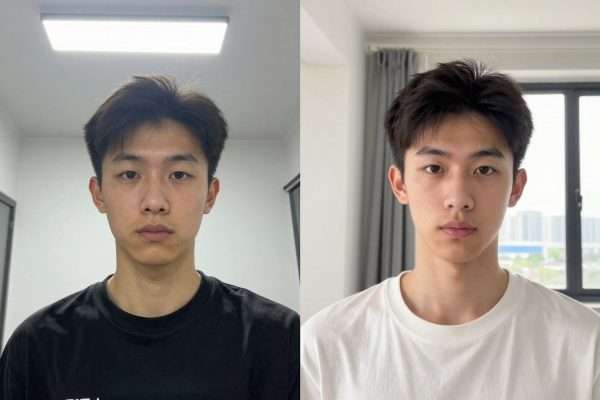
Angle matters just as much as lighting. The position of your camera relative to your face changes how your features appear in photos. Most people look best when the camera sits slightly above eye level, creating a subtle downward angle. This position tends to make eyes appear larger and can help define the jawline naturally.
Composition refers to how elements arrange within the frame of your photo. A well-composed selfie balances your face within the image, leaves appropriate space around your head, and includes or excludes background elements intentionally. Simple backgrounds often work better than busy ones because they keep focus on your face.
Expression brings personality into your selfie. Whether you prefer a genuine smile, a subtle smirk, or a more serious look, your facial expression should feel natural and authentic. Forced expressions usually look awkward in photos, while relaxed, genuine emotions translate well to images.
Technical Elements
The technical side of selfies includes camera settings, focus, and stability. Modern smartphones handle most technical aspects automatically, but understanding these elements helps you make better choices.
- Focus ensures your face appears sharp and clear in the image
- Exposure controls how bright or dark the overall photo appears
- White balance affects the color temperature and mood of your photo
- Resolution determines the quality and detail level of the final image
Artistic Elements
Beyond technical considerations, artistic choices shape how your selfie looks and feels. These creative decisions reflect your personal style and the message you want to convey.
- Color scheme influences the overall mood and aesthetic appeal
- Framing choices determine what appears in and out of the shot
- Timing captures the right moment and natural expression
- Post-processing enhances the photo while maintaining authenticity
Every great selfie combines these technical and artistic elements in ways that feel effortless. The good news is that with practice, these considerations become second nature. You start to recognize good lighting instinctively, position your camera at flattering angles automatically, and compose shots that look professional without conscious effort.
The key thing to remember is that taking selfies is a skill like any other. Nobody starts out as an expert. Some of the most impressive selfies you see on social media from influencers and celebrities are the result of dozens of attempts, careful positioning, and sometimes hours of effort. The difference between them and everyone else often comes down to persistence and willingness to learn.
Mastering Camera Hold and Body Positioning for Better Selfies
The way you hold your phone and position your body forms the foundation of every selfie you take. These fundamental techniques might seem basic, but they make a dramatic difference in your final results.
The Proper Phone Grip
Most people naturally hold their phone with one hand when taking a selfie, but this approach can lead to shaky photos and limited control. A better method involves using both hands when possible. Hold your phone with your dominant hand while using your other hand to support and stabilize it from beneath or the side.
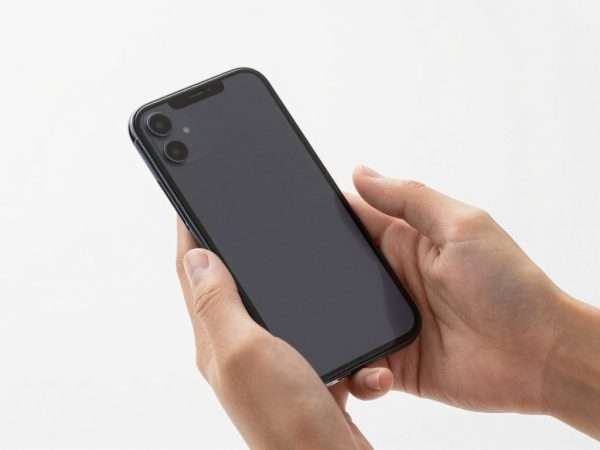
Your thumb should rest comfortably near the volume buttons, which many phones allow you to use as a shutter button. This setup gives you more stability than stretching your index finger across the screen to tap the capture button. Some people find it helpful to tuck their elbows against their body for additional support, creating a stable platform for the camera.
Finding Your Best Angles
Camera angle dramatically affects how you appear in photos. The position of your phone relative to your face changes the way features present themselves in the final image. Experiment with these different angles to discover what works best for your face shape and personal style.
Above Eye Level
Holding the camera slightly above your eyes creates a subtle downward angle. This position tends to make eyes appear larger and more prominent. It can also help define the jawline and minimize the appearance of a double chin. This angle works particularly well for most face shapes and has become the default selfie angle for many people.
Eye Level
Positioning the camera directly at eye level creates a straight-on view that feels more natural and conversational. This angle works well when you want an honest, authentic representation. It shows your face as others see you in person during normal conversations. This works best when you have good lighting and want to showcase natural features.
Below Eye Level
Shooting from below can create dramatic effects but requires careful execution. This angle tends to emphasize the chin and jaw while making the forehead appear smaller. It can work well in specific artistic contexts or when you want to show more of the background behind you. Use this angle sparingly and with intention.
Body Positioning and Posture
Your body position affects much more than just what appears in the frame. Good posture translates to better-looking selfies even when only your face and shoulders show in the photo. Stand or sit up straight with your shoulders back. This simple adjustment makes your neck appear longer and more defined.
Turn your body slightly to one side rather than facing the camera straight on. A subtle three-quarter angle adds dimension and interest to your selfie. Most people have a preferred side that they feel photographs better. Take time to discover which side of your face you prefer by taking test selfies from both angles.
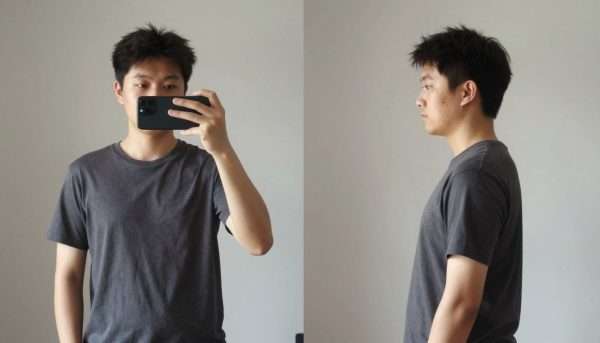
Distance from the camera matters more than many people realize. Holding your phone too close creates distortion that makes your nose appear larger and your face wider. Extend your arm fully to create proper distance between the camera and your face. If your arms feel too short to get the framing you want, consider using a selfie stick to extend your reach even further.
Hand and Arm Placement
What you do with your free hand and arms affects the overall composition of your selfie. Awkwardly positioned limbs can distract from your face or create unflattering angles. Try these approaches to make your hand placement work in your favor.
- Rest your free hand naturally on your hip or lap rather than letting it hang awkwardly
- Touch your face gently with your fingertips for a thoughtful, natural look
- Run fingers through your hair to add movement and casual elegance
- Keep your arm that is holding the phone slightly bent at the elbow to avoid tension
- Position your shoulders at a slight angle rather than square to the camera
- Tilt your head very subtly to one side for a more natural, less rigid appearance
The goal with all these positioning techniques is to look natural and relaxed. Stiff, forced positions translate clearly in photos and make selfies look awkward. Practice these techniques in front of a mirror before taking actual photos. This lets you see how different positions look from the camera perspective without wasting time taking dozens of test shots.
Enhance Your Selfie Game with Professional Tools
Ready to take your selfie skills to the next level? Modern camera apps offer advanced features like grid overlays, timer functions, and burst mode that make positioning and timing much easier. Explore photography apps designed specifically for selfie enthusiasts.
Lighting Techniques That Transform Your Selfie Quality
Light makes or breaks a selfie more than any other single factor. Understanding how to find, use, and manipulate light will elevate your selfie game dramatically. The difference between harsh, unflattering light and soft, beautiful illumination changes everything about how you appear in photos.
Natural Light: Your Best Friend
Natural light from the sun provides the most flattering illumination for selfies. The key is learning when and where to use it. Different times of day produce dramatically different lighting qualities that affect how your selfie looks.

Morning light, especially in the first few hours after sunrise, creates soft, warm tones that look beautiful on skin. This time of day offers gentle illumination that enhances natural features without creating harsh shadows. The sun sits lower in the sky, producing light that wraps around your face more evenly than midday sun.
Midday sun presents challenges for selfies. When the sun sits directly overhead, it creates harsh shadows under your eyes, nose, and chin. These shadows age your appearance and create unflattering contrasts. If you must take selfies during this time, seek shaded areas where the light feels softer and more diffused.
Golden hour, which occurs in the hour before sunset, provides the most magical light for selfies. The sun sits low on the horizon, casting warm, golden tones across everything it touches. This light makes skin glow and creates a dreamy, professional quality in photos. Photographers consider golden hour the premium time for portraits for good reason.
Window Light Mastery
Windows provide controlled natural light that you can use any time of day. The key is positioning yourself correctly relative to the window to achieve the look you want. Window light offers consistency that outdoor light cannot match, making it perfect for indoor selfies.
Face the window directly for even, flattering illumination across your entire face. This setup minimizes shadows and creates bright, clear selfies. The light should hit your face straight on, filling in any potential shadow areas. This works especially well on overcast days when clouds diffuse the sunlight naturally.
Position yourself at a forty-five degree angle to the window for more dramatic lighting with defined shadows. This creates dimension and depth in your selfie, showing the contours of your face more clearly. The shadow side adds interest while the lit side remains bright and clear.
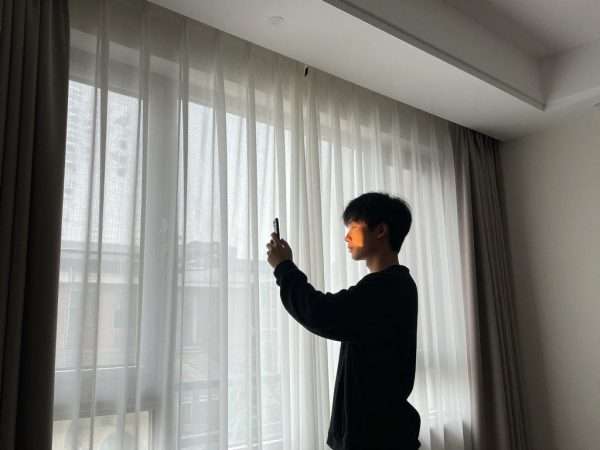
Sheer curtains work wonders for diffusing harsh window light. Direct sunlight streaming through a window can be too intense, creating the same harsh shadows you would find outdoors. A thin white curtain softens and spreads the light, creating beautiful, even illumination perfect for selfies.
Artificial Lighting Solutions
Sometimes natural light is not available or sufficient. Understanding artificial lighting options gives you flexibility to take great selfies any time of day or night. The right artificial lighting can rival or even surpass natural light in quality.

Ring lights have become incredibly popular among people who take selfies regularly for social media. These circular LED lights attach to or sit around your phone, providing even, shadowless illumination that flatters skin tones. Ring lights create a distinctive circular reflection in your eyes that many people find appealing. They come in various sizes and brightness levels to suit different needs.
Desk lamps can work in a pinch for artificial lighting. Position a lamp with a white or warm bulb to one side of your face, creating directional light similar to window light. Avoid placing lamps directly above or below your face, as these positions create unflattering shadows. Multiple lamps positioned on different sides can fill in shadows and create more balanced lighting.
Understanding Light Direction
Where light comes from matters as much as the quality of the light itself. Different light directions create completely different moods and effects in your selfies. Learning to control and choose light direction gives you creative power over your final image.
- Front lighting hits your face straight on, minimizing shadows and creating even illumination across all features
- Side lighting comes from one side, creating dimension through shadows on the opposite side of your face
- Back lighting places the light source behind you, which can create silhouettes or glowing rim light effects
- Top lighting comes from above and generally creates unflattering shadows under eyes and nose
- Bottom lighting shines up from below your face and creates an unnatural, dramatic effect
Most flattering selfies use front or side lighting. These directions show your features clearly while adding enough shadow to create natural dimension. Experiment with moving around your light source to see how different positions change your appearance in the camera.
Pro Tip: Use a white piece of paper or foam board as a reflector to bounce light back into shadow areas. Position the reflector on the side opposite your light source to fill in shadows and create more balanced illumination. This simple trick works with both natural and artificial light.
Avoiding Common Lighting Mistakes
Certain lighting situations consistently produce poor results in selfies. Learning to recognize and avoid these scenarios saves time and frustration. Your phone camera can only do so much to compensate for bad lighting.
Overhead fluorescent lights, common in offices and stores, create a harsh, unflattering green or blue color cast. These lights also cast shadows in all the wrong places, particularly under eyes and in the hollows of cheeks. When stuck with fluorescent lighting, position yourself to also capture some natural light from windows to balance the color temperature.
Mixed lighting from different sources with different color temperatures creates confusing, unattractive results. For example, combining warm tungsten lamp light with cool daylight creates strange color variations across your face. Stick to one type of light source when possible, or adjust your white balance settings to compensate.
Direct flash from your phone rarely produces flattering results. The harsh, direct light washes out features and creates red-eye or stark shadows behind you. Modern phone cameras perform well enough in low light that you can usually avoid using flash altogether. If you must use flash, try diffusing it with a thin piece of tissue over the flash to soften the light.
Upgrade Your Lighting Setup
Professional-quality lighting does not require a professional budget. Portable LED ring lights and clip-on smartphone lights provide studio-quality illumination anywhere you go. Many popular options cost less than dinner out and last for years.
Mastering Angles and Composition for Picture-Perfect Selfies
The angle at which you shoot your selfie and how you compose elements within the frame separates amateur snapshots from professional-looking self-portraits. Small adjustments in camera position and framing create dramatic improvements in your final results.
The Psychology of Angles
Different camera angles trigger different psychological responses in viewers. Understanding these effects helps you choose angles that convey the mood and message you intend. The angle you select tells a story beyond just showing your face.

High angles, with the camera above eye level, create a sense of vulnerability and youth. This angle makes eyes appear larger and more prominent, which humans naturally associate with youthfulness and approachability. The downward perspective also tends to slim the face and emphasize facial features over body mass. This explains why the slightly elevated angle has become the default selfie position for millions of people around the world.
Eye-level angles create equality and intimacy. When the camera sits at the same height as your eyes, it mimics the perspective of a person standing directly in front of you. This angle feels more honest and direct, creating a sense of connection with viewers. Use this angle when you want your selfie to feel genuine and authentic rather than posed or stylized.
Low angles, shooting upward from below eye level, convey power and dominance. This perspective makes you appear larger and more imposing. While this can work for specific artistic effects, it generally creates less flattering selfies because it emphasizes the underside of your chin and nostrils. Use this angle intentionally and sparingly.
Horizontal Angle Considerations
Beyond vertical camera position, the horizontal angle at which you shoot matters enormously. Most people look better when photographed from a slight angle rather than straight on. This creates depth and shows the contours of your face more attractively.
Your face likely has a “good side” that photographs better than the other. Everyone has natural asymmetries, and one side typically looks more balanced and attractive in photos. Take test selfies from both the left and right sides to discover which you prefer. Once you identify your preferred side, consistently shoot from that angle for more reliable results.
Three-Quarter Angle
The three-quarter view, where you turn your face about forty-five degrees from the camera, creates the most flattering perspective for most people. This angle shows enough of both sides of your face to appear balanced while creating dimension and interest. It highlights cheekbones and jawline while minimizing any asymmetries.
Profile Angle
Full profile shots, showing only one side of your face, create dramatic, artistic selfies. This angle works particularly well if you have a strong jawline or interesting profile features. Profile selfies feel more intentional and artistic than standard front-facing shots, making them perfect for fashion or artistic posts on social media.
Composition Rules for Stronger Selfies
Composition refers to how you arrange elements within the frame of your photo. Following established composition principles helps create more visually appealing, balanced selfies that feel professional rather than haphazard.
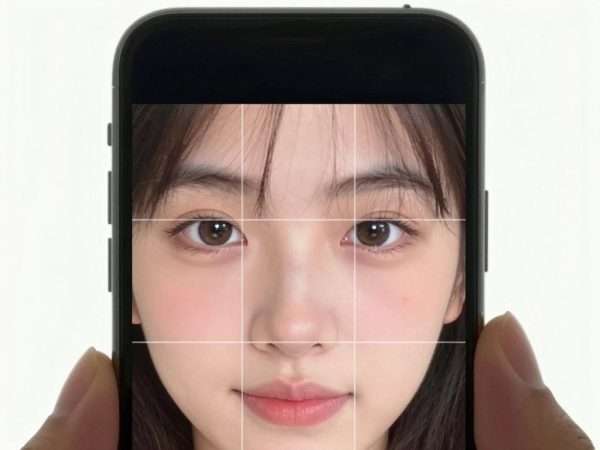
The rule of thirds divides your frame into nine equal sections using two horizontal and two vertical lines. Positioning important elements along these lines or at their intersections creates more dynamic, interesting compositions. In selfies, try placing your eyes along the upper horizontal line rather than centering your face in the frame. Many phone cameras include a grid overlay option that shows these lines while you shoot.
Negative space, the empty area around your face, plays a crucial role in composition. Too little negative space makes selfies feel cramped and claustrophobic. Too much makes you appear small and insignificant in the frame. Aim for a balance where your face and shoulders occupy roughly two-thirds of the frame, leaving one-third as breathing room.
Leading lines guide the viewer’s eye toward your face. These might be actual lines in your environment, like a hallway or railing, or implied lines created by the direction of light or shadow. Use leading lines to draw attention to your face and create depth in your selfies.
Background Selection and Management
What appears behind you in a selfie affects the overall quality just as much as how you position yourself. A cluttered or distracting background pulls attention away from your face and makes the entire image feel chaotic and unprofessional.
- Choose simple, uncluttered backgrounds that complement rather than compete with your face
- Check for unintentional photobombs or embarrassing elements before shooting
- Use shallow depth of field to blur backgrounds and keep focus on your face
- Position yourself further from walls to avoid harsh shadows behind you
- Consider how background colors interact with your skin tone and clothing
- Look for interesting textures or patterns that add visual interest without distraction
Natural settings like parks, beaches, or gardens provide beautiful, organic backgrounds for outdoor selfies. The varied colors and textures of nature add interest while remaining visually pleasing. Urban environments with interesting architecture can work well too, as long as the buildings do not overwhelm your face in the composition.
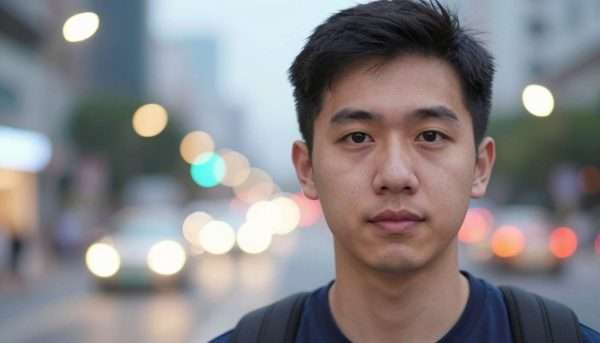
Portrait mode on modern smartphones creates artificial background blur that mimics professional camera effects. This feature isolates your face from the background, making you the clear focal point of the image. The effect works best when you position yourself at least three feet from the background, giving the phone clear separation to work with.
Framing Your Face
How much of yourself you include in the frame changes the entire feel of your selfie. Different framing choices serve different purposes and create different emotional impacts on viewers.
Close-Up Framing
Tight framing shows just your face, cutting off at the top of your head and bottom of your chin. This intimate framing creates connection and emphasizes facial features and expression. Use this framing when you want to highlight makeup, eyes, or facial details.
Head and Shoulders
Medium framing includes your face and shoulders, the classic selfie composition. This provides context about your outfit and setting while keeping focus on your face. This versatile framing works for most selfie situations and feels natural and comfortable.
Full Body
Wide framing captures your entire body, requiring more distance or a selfie stick. This framing shows outfit details and full context of your location. Use this when fashion or environment matters as much as your face in telling the story of your photo.
Optimizing Camera Settings and Phone Features for Superior Selfies
Modern smartphones pack impressive camera technology into compact devices. Learning to use the features and settings available on your phone dramatically improves selfie quality. Most people barely scratch the surface of their phone camera capabilities.
Essential Camera Settings to Master
Your phone camera includes numerous settings that affect how your selfies look. Understanding these controls gives you creative power over your final images. While automatic settings work fine for quick snapshots, manual adjustments yield better results when you have time to set up your shot.
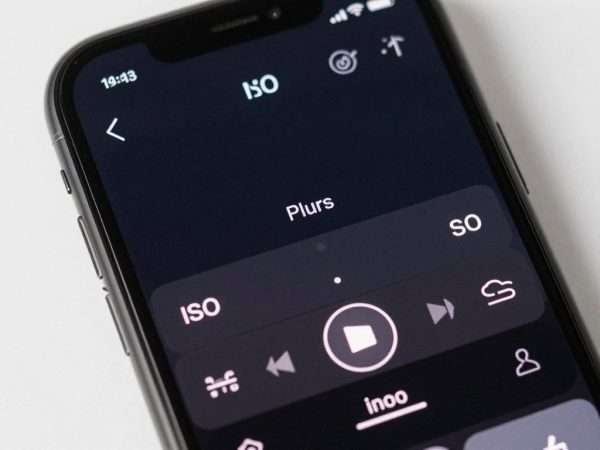
Exposure controls how bright or dark your photo appears. Most phone cameras let you adjust exposure by tapping the screen where you want to focus, then sliding a brightness control up or down. For selfies, you generally want your face properly exposed, which means it should be neither too bright nor too dark. In challenging lighting, manually adjusting exposure ensures your face looks its best even if the background ends up over or underexposed.
Focus determines which part of your image appears sharp and clear. Phone cameras typically focus automatically on the largest face in the frame, which works well for standard selfies. However, you can manually select focus by tapping the screen where you want maximum sharpness. For close-up selfies, tap on your eyes to ensure they appear razor sharp, as eyes naturally draw viewer attention.
White balance affects the color temperature of your photo. Different light sources produce different color casts – tungsten bulbs create warm orange tones while fluorescent lights add cool blue tints. Your phone usually adjusts white balance automatically, but manual control helps correct color issues. Look for settings like “daylight,” “cloudy,” “tungsten,” or “fluorescent” to match your lighting situation.
Portrait Mode and Depth Effects
Portrait mode represents one of the most significant advances in smartphone photography technology. This feature uses software and sometimes multiple lenses to create background blur that mimics expensive professional cameras. The effect, called bokeh, makes you stand out from your background.
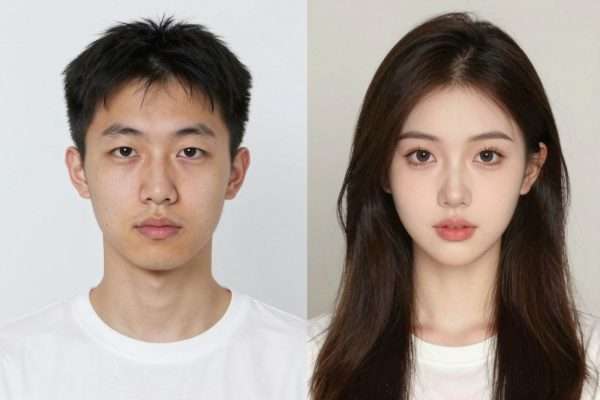
Portrait mode works best when you position yourself at arm’s length or slightly further from the camera. You also need adequate distance between yourself and the background – at least three to four feet works well. The phone analyzes the scene to determine what should stay sharp and what should blur, creating depth separation.
Most phones offer portrait lighting options that simulate studio lighting setups. These might include options like “Natural Light,” “Studio Light,” “Contour Light,” or “Stage Light.” Experiment with these modes to see how they affect the look and feel of your selfies. Some create dramatic effects while others offer subtle enhancements.
Depth control allows you to adjust how much background blur appears in your portrait mode selfies. You can usually adjust this setting before or after taking the photo. More blur creates a dreamier, more professional look, while less blur maintains more environmental context. Find the balance that works for your style and the story you want your selfie to tell.
HDR and Other Advanced Features
HDR (High Dynamic Range) combines multiple exposures into one image that captures detail in both bright and dark areas. This feature excels in high-contrast situations, like when you take selfies with a bright window or sky behind you. HDR prevents your face from appearing too dark when the background is bright.
However, HDR does not work well for every situation. It requires your phone to take multiple photos rapidly and combine them, which means any movement creates blur or ghosting. Use HDR for still selfies in challenging lighting, but disable it when you want to capture motion or in even lighting where it provides no benefit.
Timer Function
The timer allows you to set up your shot and get into position before the photo captures. This proves invaluable for selfies where you want both hands free or need time to adjust your pose. Most phones offer three-second and ten-second timer options. The longer delay gives you time to hide the fact that you are taking a selfie and create more natural-looking photos.
Burst Mode
Burst mode captures multiple photos in rapid succession, usually by holding down the shutter button. This increases your chances of getting the perfect shot, especially for selfies with friends or when trying to capture a specific expression. You can review the burst afterwards and select the best frame, deleting the rest.
Grid Lines and Level Indicators
Most phone cameras can display grid lines that overlay the viewfinder. These grids help you compose shots using the rule of thirds and ensure your selfies are level rather than tilted. Enable this feature in your camera settings and use it to align your eyes along the upper grid line for more professional-looking composition.
Some phones also include a level indicator that shows when your phone is perfectly horizontal or vertical. This prevents accidentally tilted selfies that look amateurish. A slight intentional tilt can add artistic flair, but unintentional tilting just looks sloppy.
Resolution and Format Settings
Your phone camera can likely capture photos at various resolution settings. Higher resolution means more detail and larger file sizes. For selfies you plan to share on social media, medium resolution settings work perfectly fine since social platforms compress images anyway. Save maximum resolution for selfies you plan to print or use professionally.
File Format Consideration: Some phones let you choose between JPEG and HEIC/HEIF formats. JPEG offers universal compatibility across all devices and platforms. HEIC provides better quality at smaller file sizes but may not work on older devices or certain websites. For social media sharing, JPEG remains the safer choice.
Front Camera vs. Rear Camera
While the front-facing camera is designed for selfies, your phone’s rear camera typically offers superior quality. The rear camera usually has more megapixels, better optics, and advanced features the front camera lacks. For the highest quality selfies, consider using the rear camera with your phone’s timer or a tripod and remote shutter.
The tradeoff is convenience and framing. You cannot see yourself while using the rear camera unless your phone has a small preview screen on the back. For quick, casual selfies, the front camera works great. For important selfies where quality matters most, the rear camera delivers better results.
Master Your Phone Camera Like a Pro
Third-party camera apps often provide more manual controls and advanced features than your phone’s default camera app. Professional photography apps give you complete control over every aspect of your selfies, from ISO to shutter speed.
Common Selfie Mistakes to Avoid
Even experienced selfie-takers make mistakes that undermine their photos. Recognizing these common errors helps you avoid them and consistently produce better results. Small changes in technique often yield dramatic improvements in your final selfies.
Technical Mistakes That Ruin Selfies
Technical errors create problems that even the best lighting and angles cannot overcome. These mistakes happen to everyone, but awareness helps you catch and correct them before they ruin your shots.
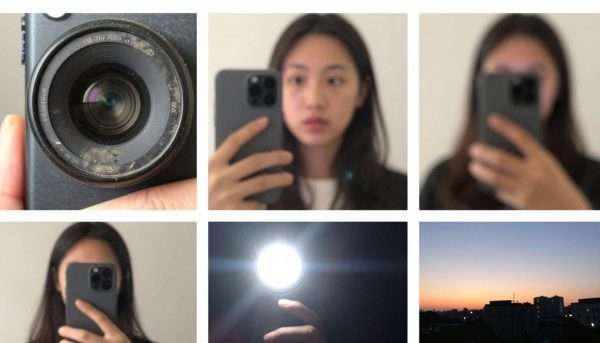
Dirty camera lenses plague more selfies than most people realize. Your phone lives in your pocket or purse, collecting oils, dust, and grime on the lens. A smudged lens creates hazy, soft-focus selfies that lack sharpness and clarity. Wipe your lens with a soft cloth before every photo session. The difference amazes most people once they start paying attention to lens cleanliness.
Camera shake from hand movement creates blurry selfies. This happens most often in low light when your phone uses slower shutter speeds. Brace your elbows against your body or a stable surface to minimize shake. The timer function also helps by eliminating movement from pressing the shutter button. If you frequently struggle with shaky selfies, consider a small tripod or phone grip for better stability.
Wrong focus placement makes the background sharp while your face appears soft and blurry. This happens when your phone focuses on something behind you rather than your face. Always tap your face on the screen to lock focus before taking the shot. Modern phones usually indicate focus with a yellow or green box showing where the camera has locked onto.
Lighting and Exposure Errors
Even good lighting can go wrong when you do not manage it properly. These common lighting mistakes make otherwise good selfies look amateurish and unflattering.
- Backlighting without exposure compensation makes your face appear too dark or in silhouette
- Harsh direct sunlight creates unflattering shadows and causes squinting
- Using phone flash as the primary light source washes out features and creates flat, lifeless photos
- Inconsistent lighting across your face from poorly positioned light sources creates strange color variations
- Overly bright or dark exposure that clips highlights or loses shadow detail
- Mixed color temperatures from different light sources creating strange color casts
Warning: Overhead lighting from ceiling fixtures creates shadows under your eyes, nose, and chin that age your appearance significantly. Whenever possible, turn off overhead lights and rely on side lighting from windows or lamps instead.
Composition and Framing Blunders
How you frame and compose your selfie affects the overall impact as much as technical quality. These compositional mistakes distract from your face and make selfies feel amateur.
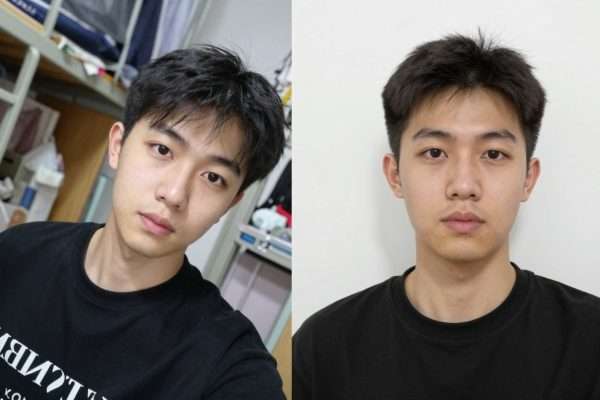
Cluttered backgrounds pull attention away from your face and make selfies look messy. Before pressing the shutter, look at everything visible in the frame behind you. Move items, change your position, or blur the background with portrait mode to eliminate distractions. A clean background makes you the clear focal point.
Too much or too little headroom creates unbalanced compositions. Leaving excessive space above your head makes you appear small and lost in the frame. Cutting off the top of your head makes selfies feel cramped. Aim for about ten to twenty percent of the frame height above your head for balanced composition.
Tilted horizons make selfies look like accidents rather than intentional photos. While a slight artistic tilt can work, most tilted selfies just look sloppy. Use your phone’s grid lines to keep horizontal and vertical lines straight, or enable the level indicator if your phone includes one.
Angle and Posture Problems
How you position yourself and your camera creates or destroys the flattering quality of selfies. These angle mistakes consistently produce unflattering results that proper positioning easily avoids.
Too Close to Camera
Holding your phone too close to your face creates distortion that makes your nose appear larger and your face wider. This fish-eye effect comes from the wide-angle lenses in phone cameras. Extend your arm fully or use a selfie stick to create proper distance that minimizes distortion and shows your proportions accurately.
Poor Posture
Slouching or hunching creates unflattering angles that emphasize double chins and minimize your neck. Stand or sit up straight with shoulders back. Good posture makes everyone look better in photos, even when only your face and shoulders appear in the frame. Your body position affects how your neck and jawline present themselves.
Looking down at the camera creates an unflattering double chin and shows more of the top of your head than you intend. The camera should sit at eye level or slightly above, never below. This might feel awkward at first, especially if you are used to looking down at your phone for everything else, but the improvement in your selfies makes the adjustment worthwhile.
Expression and Timing Issues
The moment you capture and the expression you wear matters enormously. These mistakes related to expression and timing undermine otherwise technically perfect selfies.
Forced smiles look awkward and unnatural in photos. Your eyes give away fake expressions – genuine smiles engage the muscles around your eyes, creating crow’s feet and lifted cheeks. Forced smiles only move the mouth while eyes remain unchanged. Think of something that makes you genuinely happy or laugh at a joke right before taking the selfie to capture authentic expressions.

Blinking at the exact moment of capture ruins countless selfies. This happens more often than you might think, especially in burst mode where you might blink during one of the frames. Use burst mode and take multiple shots to ensure you get at least one with your eyes open and looking natural. Review your photos immediately after taking them to catch blinks before you move to a different location.
Stiff, rigid poses make selfies look uncomfortable and forced. Relax your shoulders, take a deep breath, and let your natural personality show through. Some people find it helpful to take a few throwaway shots to warm up and relax before capturing the selfie they actually intend to share. The practice shots help you settle into more natural, comfortable positions.
Over-Editing and Filter Abuse
While editing can enhance selfies, too much processing creates artificial-looking results that fool nobody. These editing mistakes cross the line from enhancement to distortion.
- Excessive smoothing that removes all skin texture and makes you look like a plastic mannequin
- Unrealistic editing that changes your appearance so dramatically you become unrecognizable
- Heavy filters that distort colors and create unnatural skin tones
- Over-sharpening that creates harsh, artificial edges and emphasizes imperfections
- Obvious beauty tool artifacts like blurred ears or warped backgrounds from face-reshaping tools
The goal of editing should be enhancement rather than transformation. Subtle adjustments to brightness, contrast, and color look professional. Heavy-handed edits that change your fundamental appearance look fake and undermine trust with your audience on social media. People appreciate authentic selfies that show real people rather than heavily processed fantasy versions.
Mastering Indoor Selfie Techniques
Indoor environments present unique challenges and opportunities for selfies. The controlled nature of indoor settings gives you more creative freedom, but you must work harder to find good lighting. Understanding how to maximize indoor conditions helps you take great selfies regardless of weather or time of day.
Working with Available Indoor Light
Indoor lighting varies dramatically from space to space and time to time. Learning to assess and utilize whatever light you find indoors separates good indoor selfies from poor ones. The light sources in your home offer more variety than you might realize.
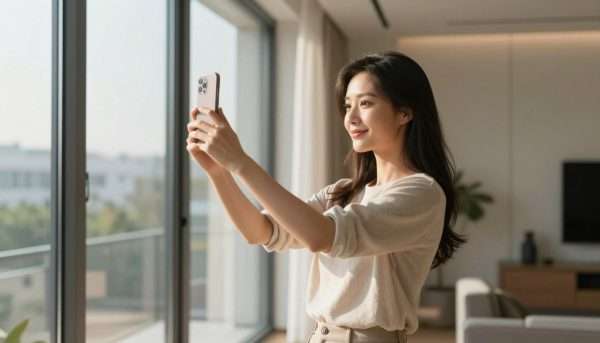
Windows provide the best indoor light source for selfies. Position yourself facing a window for even, flattering light across your face. The larger the window, the softer and more beautiful the light becomes. North-facing windows provide consistent light throughout the day, while east and west windows offer beautiful golden light during morning and evening hours respectively.
Distance from the window affects light quality on your face. Sitting very close to a window creates dramatic side lighting with defined shadows. Moving several feet back creates softer, more even illumination. Experiment with your distance to find the look you prefer. White walls near windows bounce light back into shadow areas, naturally filling in harsh contrasts.
Curtains and blinds give you control over window light intensity and quality. Sheer white curtains diffuse harsh sunlight into beautiful, soft illumination perfect for selfies. Heavy curtains let you block unwanted light or create darker, moodier atmospheres. Adjustable blinds allow precise control over light direction and intensity.
Creating Your Own Indoor Lighting
When natural light proves insufficient or unavailable, creating your own lighting setup gives you complete control. You do not need expensive equipment to build effective lighting for indoor selfies.
Desk Lamp Setup
A simple desk lamp with a daylight-balanced LED bulb provides directional light you can position anywhere. Place the lamp at a forty-five degree angle to one side of your face for classic portrait lighting. Add a second lamp on the opposite side at lower intensity to fill in shadows.
Ring Light
Ring lights create even, shadowless illumination that flatters skin and creates distinctive circular catchlights in eyes. These circular LED lights sit around or clip onto your phone, providing consistent lighting regardless of your environment. Dimmable ring lights adapt to different situations and desired moods.
DIY Reflectors
White foam boards, poster boards, or even large sheets of white paper bounce light back into shadow areas. Position a reflector opposite your main light source to fill in shadows and create more balanced lighting. This simple trick dramatically improves lighting quality with minimal cost or effort.
Room Selection and Setup
Different rooms in your home offer different advantages for selfies. Choosing the right space for the look you want makes the entire process easier and produces better results.
Bathrooms often have large mirrors and decent lighting, making them popular selfie locations. However, bathroom lighting frequently comes from overhead fixtures that create unflattering shadows. If you take selfies in the bathroom, turn off overhead lights and rely on natural light from windows or bring in a lamp for better illumination.
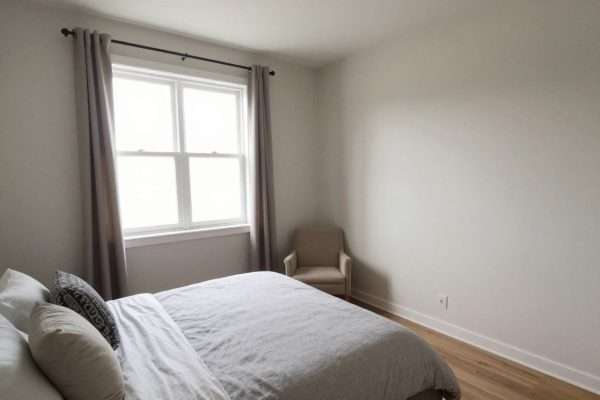
Bedrooms provide comfortable, personal settings with varied lighting options. The relaxed atmosphere of a bedroom helps you feel more natural and less self-conscious. Choose a wall or corner with minimal clutter as your background. Many people designate a specific corner of their bedroom as their selfie spot, where they have worked out the lighting and background details.
Living rooms typically offer the most space and the largest windows. The extra room makes it easier to experiment with different angles and distances. Living rooms also tend to have more interesting decor and background options that add personality to selfies without overwhelming your face.
Background Management Indoors
Indoor backgrounds require more active management than outdoor settings. Everything in your home tells a story, and you want that story to enhance rather than distract from your selfie.
- Clean up visible clutter before taking selfies – messy backgrounds make the entire photo feel chaotic
- Choose walls or areas with simple, complementary colors that do not compete with your outfit or face
- Arrange intentional background elements like plants, artwork, or books that add interest
- Ensure nothing embarrassing or inappropriate appears in the background
- Consider hanging a plain sheet or backdrop if you want ultimate control over your background
- Use depth of field or portrait mode to blur distracting background elements
The background should support and complement your selfie without drawing attention away from your face. Think of it as the stage set for your performance – important for context and mood, but never the main attraction.
Time of Day Considerations
Even indoors, the time of day affects lighting quality and availability. Understanding these patterns helps you plan when to take selfies for optimal results.
Morning Light
Morning offers soft, cool-toned natural light that gradually warms as the sun rises higher. East-facing windows provide beautiful direct light in the morning hours. The quality tends to be gentle and flattering, perfect for fresh, natural-looking selfies. Morning light works especially well for bright, energetic selfies.
Evening Light
Evening brings warm, golden tones as the sun sets. West-facing windows capture this magic hour glow indoors. Evening light creates a cozy, intimate atmosphere perfect for more relaxed, casual selfies. The warm color temperature flatters most skin tones and creates a welcoming mood.
Midday presents challenges indoors just as it does outdoors. Direct sunlight streaming through windows becomes harsh and creates strong contrasts. If you must shoot during midday hours, position yourself near but not directly in the window light, or use curtains to diffuse the intensity.
Nighttime requires artificial lighting exclusively. This gives you complete control but requires more effort to create flattering illumination. Warm-toned lamps create cozy evening selfies, while bright white lights produce more energetic, daytime-like results even after dark.
Perfecting Outdoor Selfie Techniques
Outdoor selfies offer natural beauty and varied backdrops that indoor settings cannot match. The natural world provides endless creative opportunities, from dramatic landscapes to urban architecture. Learning to work with outdoor conditions helps you capture stunning selfies in any environment.
Harnessing Natural Light Outdoors
Natural outdoor light changes constantly throughout the day. Understanding these changes helps you choose the best time and location for the selfie style you want. The sun’s position and the weather conditions dramatically affect how your outdoor selfies look.

Golden hour, the period shortly after sunrise and before sunset, provides the most beautiful natural light for outdoor selfies. The sun sits low on the horizon, casting warm, golden tones that make skin glow. Shadows become long and soft, creating dimension without harshness. Professional photographers plan outdoor shoots around golden hour for good reason – the light quality during this time cannot be replicated artificially.
Overcast days create natural diffusion that works beautifully for selfies. Clouds act as a giant softbox, spreading sunlight evenly and eliminating harsh shadows. While overcast light lacks the dramatic quality of golden hour, it provides consistent, flattering illumination perfect for capturing true skin tones and colors. Many professional portrait photographers actually prefer cloudy conditions over bright sunshine.
Shade provides refuge from harsh midday sun while still offering natural light. Position yourself in the shade of a building, tree, or overhang to escape direct sunlight. The reflected light in shaded areas tends to be soft and even, similar to cloudy day conditions. However, be aware that shade under trees can create dappled light patterns on your face from sun filtering through leaves.
Location Selection and Background
Where you take your outdoor selfie matters as much as when you take it. Different environments offer different aesthetics and challenges. Choose locations that align with the mood and story you want your selfie to convey.
Natural Settings
Parks, gardens, beaches, and hiking trails provide organic beauty that adds visual interest to selfies. Natural settings work particularly well for relaxed, casual selfies that emphasize connection with the outdoors. The varied textures and colors of nature create appealing backgrounds without appearing busy or distracting.
Urban Environments
Cities offer architectural interest, colorful street art, and modern aesthetics. Urban selfies convey energy and style, working well for fashion-forward or edgy looks. Look for interesting walls, murals, or buildings that complement your outfit and desired vibe. Urban settings shine during blue hour when city lights create magical backdrops.
Landmarks and Attractions
Famous locations add context and story to selfies, documenting travels and adventures. Landmark selfies work best when you balance yourself with the background – you want both visible without either overwhelming the other. These selfies serve as memories of specific places and times in your life.
Weather Considerations
Different weather conditions create different moods and lighting scenarios for outdoor selfies. Learning to adapt your technique to various weather helps you take great selfies year-round.
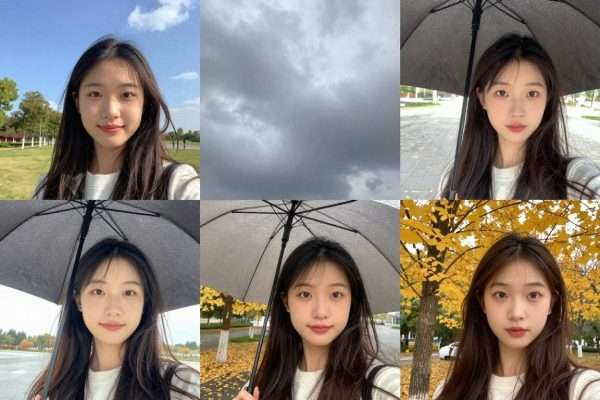
Sunny days require strategic positioning to avoid squinting and harsh shadows. Never shoot with the sun directly behind you, as this creates flat, boring lighting. Position yourself with the sun to one side for dimension, or shoot with the sun behind you and use exposure compensation to properly light your face. Sunglasses can help prevent squinting, though they hide your eyes.
Rainy or misty conditions create moody, atmospheric selfies with unique character. Light rain adds interesting texture and can create beautiful bokeh effects in the background. Protect your phone with a waterproof case or plastic bag with a hole for the lens. The soft, diffused light of rainy days flatters skin tones beautifully, though you need to increase exposure to compensate for the darker conditions.
Winter snow creates bright, reflective conditions that boost light levels considerably. Snow acts as a natural reflector, bouncing light up onto your face and filling in shadows. However, bright snow often fools your camera’s meter into underexposing, making you appear too dark. Manually increase exposure to compensate, ensuring your face appears properly lit against the bright white background.
Dealing with Wind and Movement
Outdoor conditions rarely stay perfectly still. Wind, in particular, affects outdoor selfies in ways you must account for and sometimes embrace as part of the aesthetic.
Hair movement from wind can add energy and life to selfies or create frustrating tangles across your face. For controlled wind effects, position yourself so wind blows your hair back or to the side rather than into your face. Take multiple shots in burst mode to capture moments when wind creates flattering effects rather than covering your face.
Camera shake becomes more challenging outdoors where you often lack stable surfaces for bracing. Hold your phone with both hands when possible and tuck your elbows against your body for stability. The timer function eliminates shake from pressing the shutter button. In very windy conditions, consider bringing a small tripod or finding ways to prop your phone on stable surfaces.
Seasonal Outdoor Selfie Tips
Each season offers unique opportunities and challenges for outdoor selfies. Adapting your approach to seasonal conditions helps you make the most of what each time of year offers.
- Spring brings blooming flowers and fresh green foliage that create colorful, vibrant backgrounds
- Summer provides long daylight hours and golden hour light that extends later into the evening
- Autumn offers warm color palettes and beautiful foliage that adds visual interest naturally
- Winter creates unique opportunities with snow, frost, and dramatic low-angle sunlight
Safety Reminder: Always stay aware of your surroundings when taking outdoor selfies. Watch for traffic, uneven ground, cliff edges, and other hazards. Some of the most dangerous selfie accidents happen when people focus entirely on their phone screen while in potentially hazardous environments.
Blue Hour Magic
Blue hour, the period just after sunset or before sunrise when the sky glows deep blue, creates magical lighting for outdoor selfies. This brief window offers unique opportunities for creative selfies with artificial lights.

During blue hour, artificial lights become visible while the sky retains color and detail. This balance creates depth and visual interest impossible during full daylight or complete darkness. Position yourself near street lights, building lights, or other artificial sources that add warm tones contrasting with the cool blue sky.
Blue hour requires faster shutter speeds or higher ISO settings due to lower light levels. Use burst mode to increase your chances of getting sharp images. Brace your phone against stable surfaces or use a tripod to prevent blur from camera shake in the low light conditions.
Taking Amazing Group Selfies
Group selfies present unique challenges compared to solo self-portraits. Fitting multiple people in the frame while ensuring everyone looks good requires different techniques and often additional equipment. Mastering group selfies helps you capture memories with friends and family that everyone will want to share.
Equipment for Better Group Selfies
While you can take group selfies with just your extended arm, certain tools make the process much easier and produce better results. These accessories have become standard equipment for anyone who regularly takes group photos.
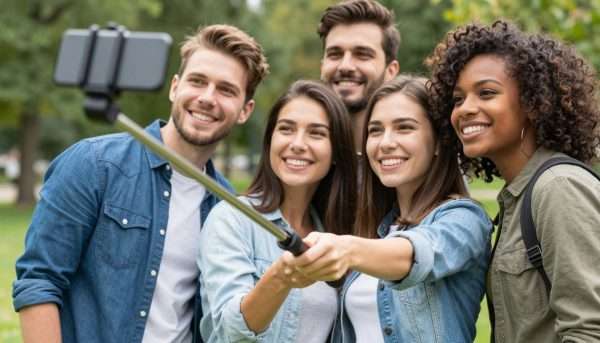
Selfie sticks extend your reach significantly, allowing you to include more people and more background in your shots. Modern selfie sticks fold compactly for easy transport and extend up to three feet or more. Look for models with Bluetooth remote triggers that let you shoot without reaching for the phone screen. This feature proves especially valuable for group shots where timing matters.
Tripods with phone mounts provide stability and let you step into the frame rather than holding the phone. Combined with your phone’s timer function, a tripod creates group selfies that look like someone else took the photo. This approach works particularly well for formal group shots where everyone wants to appear at their best without the awkward extended arm visible in the frame.
Wide-angle lenses that clip onto your phone expand the field of view, fitting more people into the frame at the same distance. These accessory lenses cost relatively little and dramatically improve group selfie capabilities. However, they can create some distortion, especially for people near the edges of the frame, so position the most important people toward the center.
Positioning and Arrangement
How you arrange people in a group selfie affects whether everyone appears clearly and attractively. Strategic positioning ensures no one gets cut off or hidden behind others.
Height Considerations
Arrange people by height to ensure faces appear clearly without overlap. Taller people should stand or position themselves in the back, while shorter people move to the front. Alternatively, people can stagger heights by having some sit or crouch while others stand, creating visual levels that let everyone appear prominently.
Spacing and Proximity
People should stand close enough to all fit in the frame without appearing cramped. Overlapping shoulders creates a sense of closeness and friendship while conserving frame space. However, leave some breathing room around faces to prevent the composition from feeling too crowded or claustrophobic.
The person holding the phone typically appears largest in the frame due to proximity to the camera. Rotate who holds the phone between shots if you want everyone to appear similarly sized. Alternatively, embrace the size difference and have the person who wants to appear most prominent hold the phone.
Timing and Coordination
Getting everyone to look at the camera with good expressions at the same moment challenges even experienced group selfie takers. These techniques help coordinate timing for better results.

Count down before taking the shot so everyone knows when to smile and look at the camera. A simple “one, two, three” gives people time to compose themselves and present their best expressions. Some groups develop signature phrases or inside jokes they say before group selfies, creating genuine smiles and laughter.
Use burst mode to capture multiple frames rapidly. Groups rarely get everyone looking perfect in a single shot, but burst mode increases your odds dramatically. Review the burst afterward and select the frame where everyone looks their best, deleting the rest.
The timer function gives you time to get into position if you want to appear in the group selfie without holding the phone. Set a ten-second timer, prop or mount your phone, then join the group. This approach works wonderfully when combined with a tripod but can work with improvised phone rests like tables, walls, or carefully balanced items.
Lighting for Groups
Lighting multiple people presents different challenges than lighting a single face. You need illumination that flatters everyone evenly without creating unflattering shadows on anyone in the group.
Front lighting works best for groups because it illuminates everyone relatively evenly. Position the group facing the light source, whether natural window light, outdoor shade, or artificial lighting. Side lighting can create dramatic effects but often results in some people receiving better light than others.
Avoid strong directional lighting that creates harsh shadows when working with groups. The variation in face angles and positions means directional light that flatters one person might create unflattering shadows on another. Soft, diffused light from overcast conditions or shaded areas provides the most consistently flattering illumination for everyone.
Backgrounds for Group Selfies
Group selfies often include more background than solo shots due to the wider framing required. Choose backgrounds carefully to complement the group without overwhelming the people in the photo.
- Simple, uncluttered backgrounds work best, keeping focus on the people rather than the environment
- Iconic or meaningful locations add context and memory value to group selfies
- Ensure the background tells an appropriate story for the group and occasion
- Watch for distracting elements like poles or signs appearing to grow from people’s heads
- Consider depth of field to blur backgrounds slightly, emphasizing the group
Upgrade Your Group Selfie Gear
Taking group selfies becomes much easier with the right equipment. Selfie sticks with Bluetooth remotes, portable tripods with phone mounts, and wide-angle lens attachments transform challenging group shots into easy, fun experiences everyone enjoys.
Creative Group Selfie Ideas
Standard group selfies work fine for documenting gatherings, but creative approaches make group photos more memorable and shareable. These ideas add personality and fun to group selfies.
Action Shots
Capture the group jumping, running, or performing coordinated movements together. These dynamic selfies convey energy and fun that static poses cannot match. Use burst mode to freeze the action at the peak moment when everyone appears suspended in motion.
Themed Poses
Coordinate outfits, props, or poses around a theme for visually cohesive group selfies. Themes might relate to holidays, inside jokes, or shared interests. Themed group selfies work particularly well for special occasions and create photos people remember and share enthusiastically.
Candid Moments
Set up the camera and capture genuine moments of the group interacting naturally rather than posing for the camera. These candid group shots often feel more authentic and emotional than traditional posed selfies. Use the timer or video mode to capture natural laughter and conversation.
Editing and Enhancing Your Selfies
Post-processing allows you to refine and polish your selfies after capturing them. The right editing approach enhances your photos while maintaining authenticity. Modern editing apps provide powerful tools that were once available only to professional photographers.
Basic Editing Fundamentals
Every selfie benefits from basic adjustments that correct exposure, color, and composition issues. These fundamental edits form the foundation of good photo processing and should be mastered before moving to more advanced techniques.

Brightness and exposure adjustments correct photos that appear too dark or too light. Increasing brightness lifts shadows and reveals detail in darker areas. Reducing brightness prevents blown-out highlights and recovers detail in overly bright areas. Most photos benefit from subtle brightness adjustments that bring the overall exposure closer to ideal.
Contrast controls the difference between the brightest and darkest parts of your image. Increasing contrast makes photos appear more vibrant and punchy, with brighter highlights and darker shadows. Reducing contrast creates softer, more subtle images. Most selfies benefit from a slight contrast boost that adds depth without appearing overdone.
Saturation affects color intensity across the entire image. Subtle saturation increases make colors appear richer and more vibrant. However, excessive saturation creates unnatural-looking skin tones and garish colors. Many editors prefer vibrance adjustments instead, which boost muted colors while protecting already-saturated tones from becoming oversaturated.
Color Correction and White Balance
Color temperature dramatically affects the mood and feel of selfies. Correcting color casts and adjusting white balance ensures skin tones appear natural and pleasing.
Warming and Cooling
Temperature adjustments shift colors toward warmer orange tones or cooler blue tones. Warmer images feel cozy and inviting, while cooler images appear fresh and energetic. Most people find slightly warm skin tones more flattering than cool ones. Adjust temperature to correct unwanted color casts from artificial lighting.
Tint Adjustments
Tint controls the green-magenta balance in your image. Green color casts often come from fluorescent lighting, while magenta casts can result from certain LED bulbs. Adjusting tint neutralizes these color issues and creates more natural-looking photos. Make tint adjustments subtle to avoid creating new color problems.
Skin Retouching and Beauty Tools
Most editing apps include skin-smoothing and beauty enhancement tools. These features can improve selfies when used subtly, but create artificial-looking results when overused. The goal should be enhancement rather than transformation.
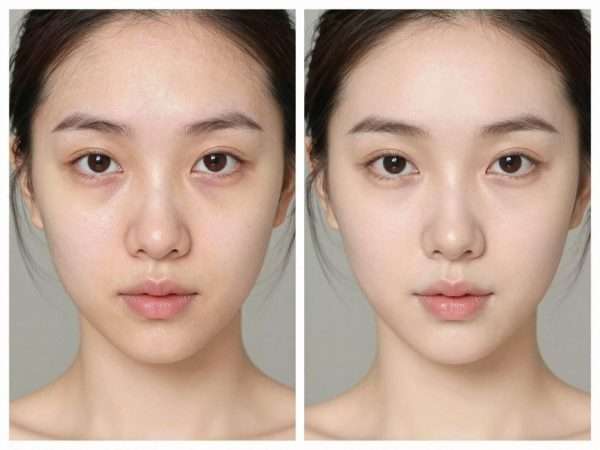
Skin smoothing reduces the appearance of blemishes and texture irregularities. Light smoothing creates polish while maintaining natural skin texture. Heavy smoothing removes all texture, creating an artificial, plastic appearance that fools nobody. Preserve some skin texture to maintain realism and authenticity in your selfies.
Spot removal tools eliminate temporary blemishes like pimples or food particles caught in teeth. These corrections make sense because they remove temporary imperfections rather than changing your actual appearance. Use spot removal for things that would not appear in a selfie taken on a different day.
Eye enhancement tools brighten whites, sharpen detail, and sometimes enlarge eyes slightly. The eyes naturally draw viewer attention in photos, so subtle eye enhancements can improve overall selfie impact. However, enlarged eyes that look cartoonish or unrealistically bright whites create an unnatural appearance that undermines photo credibility.
Filters and Preset Styles
Filters apply coordinated adjustments across multiple settings to create specific looks or moods. Quality filters can enhance selfies quickly and consistently, while poor filters create dated or artificial appearances.
- Subtle filters that enhance rather than transform work best for most selfies
- Black and white conversions create timeless, artistic interpretations of selfies
- Vintage or film-style filters add character but can appear dated if overused
- Heavy filters that drastically change colors or add unrealistic effects often look gimmicky
- Creating custom presets for your editing style ensures consistency across your selfies
The most successful filters enhance the photo’s inherent qualities rather than imposing a strong stylistic overlay. Think of filters as seasoning for food – the right amount improves the dish, but too much overwhelms the natural flavors.
Recommended Editing Apps
Dozens of photo editing apps compete for attention, each offering different features and interfaces. These apps consistently receive praise for their selfie editing capabilities and user-friendly designs.
Professional Options
Adobe Lightroom Mobile provides desktop-level editing power in a mobile app. The learning curve is steeper than simpler apps, but the control and quality make it worthwhile for serious enthusiasts. Lightroom handles everything from basic adjustments to advanced color grading and selective editing.
User-Friendly Choices
VSCO offers beautiful film-inspired filters and intuitive editing tools. The interface feels clean and minimal, making editing approachable for beginners while still providing depth for experienced users. VSCO’s community features let you discover trends and styles popular in selfie photography.
Beauty-Focused Apps
Facetune specializes in portrait retouching with tools specifically designed for selfies. While it offers powerful editing capabilities, the temptation to over-edit runs high. Use Facetune’s tools with restraint to enhance rather than transform your appearance.
Discover Professional Editing Apps
Take your selfie editing to the next level with professional-grade mobile apps. From advanced color correction to sophisticated retouching tools, modern editing apps put studio-quality processing power in your pocket.
Editing Workflow for Consistent Results
Developing a consistent editing workflow helps you process selfies efficiently while maintaining a cohesive style across all your photos. This systematic approach saves time and produces better results than random, inconsistent editing.
- Start with basic exposure and white balance corrections to establish proper brightness and color
- Adjust contrast and clarity to add depth and definition to the image
- Fine-tune colors with saturation, vibrance, and individual color channel adjustments
- Apply subtle skin retouching and blemish removal as needed
- Sharpen the image slightly to enhance detail, especially in eyes and hair
- Apply a filter or preset if desired, then reduce opacity for a more subtle effect
- Make final tweaks to overall balance and mood before saving
This workflow moves from broad adjustments to fine details, building upon each previous step. The order matters because later adjustments can undo or conflict with earlier ones if you work out of sequence.
When to Stop Editing
Knowing when to stop editing proves just as important as knowing what edits to make. Over-processing creates diminishing returns where additional edits make photos worse rather than better.
Warning Sign: If you find yourself making adjustments, undoing them, and then making similar adjustments again, you have probably passed the point of productive editing. Save your work and step away for an hour or more before making final decisions about the edit.
Your edited selfie should look like an enhanced version of reality, not a completely different person. If friends would not recognize you, or if your edited selfies look dramatically different from your appearance in person, you have edited too heavily. Aim for subtle improvements that bring out your best features without fundamentally changing your appearance.
Advanced Selfie Techniques and Creative Ideas
Once you master basic selfie skills, advanced techniques open new creative possibilities. These approaches go beyond standard selfies to create images with artistic merit and unique visual impact. Experimenting with advanced methods helps develop your personal style and keeps selfie-taking fresh and interesting.
Mirror Selfies
Mirror selfies offer a different perspective than traditional front-camera selfies. The mirror shows more of your body and surroundings while creating interesting compositional opportunities. This style has become particularly popular on social media platforms among fashion and lifestyle content creators.
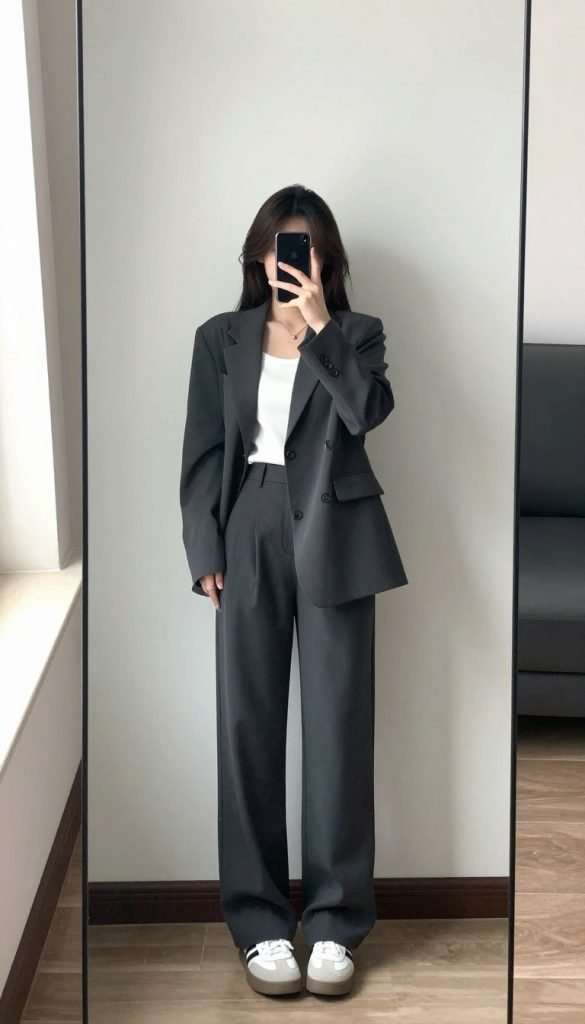
Hold your phone at different heights and angles when taking mirror selfies to create varied compositions. Waist-level creates casual, documentary-style shots perfect for showing outfits. Face-level captures more detail of your expression and upper body. Overhead angles create unique perspectives but require careful execution to avoid awkward poses.
Your phone will appear in mirror selfies unless you position it creatively. Some people embrace the phone as part of the composition, while others use it strategically to hide their face for mystery or artistic effect. Consider how the phone fits into your overall composition rather than treating it as a necessary evil.
Clean your mirror thoroughly before taking mirror selfies. Smudges, streaks, and spots distract from the photo and make the entire image look sloppy. A quick wipe with glass cleaner makes a dramatic difference in mirror selfie quality.
Creative Angles and Perspectives
Breaking away from standard selfie angles creates more dynamic, interesting images that stand out from the millions of similar selfies posted every single day. Unusual perspectives grab attention and showcase creativity.
Overhead Shots
Shooting from directly above creates a bird’s-eye view that shows you in context with your surroundings. This angle works particularly well for flat lay compositions where you arrange objects around yourself. Overhead selfies require extended arms or selfie sticks for adequate distance.
Reflection Selfies
Use reflective surfaces beyond mirrors – windows, water puddles, sunglasses, or metallic objects create interesting compositions with layered visual elements. Reflection selfies add depth and intrigue, making viewers look more closely to understand the image construction.
Shadow Selfies
Photograph your shadow rather than yourself directly, creating silhouette-based compositions. Shadow selfies work best during golden hour when shadows grow long and dramatic. This technique adds mystery and artistic flair while still capturing your presence in the scene.
Using Props and Accessories
Props add visual interest and provide context or storytelling elements to selfies. Strategic use of objects enhances composition without overwhelming your face as the primary subject.
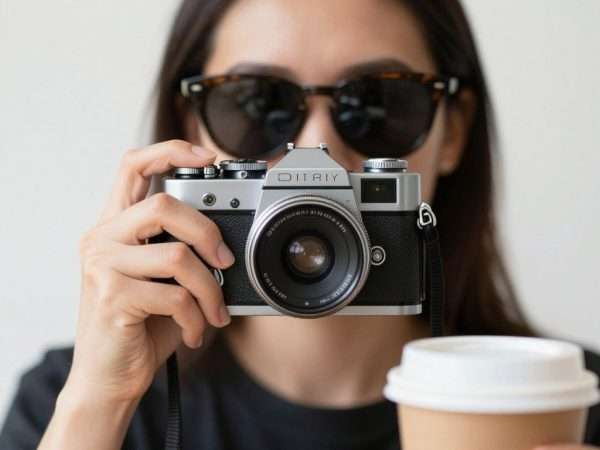
Food and beverages make popular selfie props because they provide context about activities and lifestyle. Coffee cups in morning selfies, cocktails in evening social situations, or ice cream on summer days tell stories beyond just your face. Position food and drink props carefully to complement rather than hide your face.
Flowers, plants, and natural objects add organic beauty and color to selfies. Hold flowers near your face, frame yourself with foliage, or incorporate natural elements into your composition. These props work particularly well for outdoor selfies or spring and summer content.
Fashion accessories like hats, sunglasses, or jewelry serve double duty as both style elements and compositional props. Oversized sunglasses create mystery and drama. Hats frame your face and add personality. Statement jewelry draws the eye and adds visual interest to simpler compositions.
Seasonal and Themed Selfies
Aligning selfies with seasons, holidays, or themes creates timely content that resonates with current events and shared cultural moments. Themed selfies feel relevant and relatable to your audience.
- Holiday selfies incorporate seasonal decorations, colors, and festive elements that celebrate specific occasions
- Weather-themed selfies embrace seasonal conditions like falling snow, autumn leaves, or summer sunshine
- Event selfies document concerts, sports games, festivals, or other special occasions you attend
- Costume or transformation selfies show creative makeup, cosplay, or dramatic style changes
- Challenge or trend selfies participate in viral social media movements and hashtag campaigns
Long Exposure and Motion Effects
While most selfies freeze a single moment, creative use of longer exposures or motion creates dynamic effects that add energy and visual interest. These techniques require more technical knowledge but produce striking results.
Light painting during long exposures creates trails of light around yourself. Set your phone on a tripod, use night mode or a long exposure app, and move a light source around the frame while the shutter stays open. This creates ethereal, artistic effects impossible with standard photography.
Motion blur from deliberate camera or subject movement adds energy and dynamism. Spin, jump, or move your hair while taking the selfie to create blur that conveys action and excitement. This works particularly well with the burst mode, where you can select the frame with the most appealing blur pattern.
Multiple Exposure and Composite Selfies
Advanced editing techniques allow you to combine multiple selfies into single composite images. These creative approaches produce surreal or artistic results that transcend simple photography.

Double exposure blends two images together, creating ghostly overlays or artistic combinations. Specialized apps make double exposure accessible without advanced editing skills. Combine a selfie with a landscape, cityscape, or abstract pattern for striking artistic effects.
Clone selfies show multiple versions of yourself in the same scene. Take several photos from the same position, moving to different spots in each frame. Editing apps then combine the images, placing all your versions together. This technique requires a tripod to ensure the background matches perfectly between shots.
Black and White Selfies
Removing color from selfies creates timeless, classic images that emphasize form, texture, and emotion over colorful distraction. Black and white photography has enjoyed renewed popularity in the digital age.
Black and white works particularly well for dramatic, moody selfies where emotion matters more than environment. The monochrome palette creates sophistication and artistic gravitas that color sometimes undermines. Strong lighting with defined shadows translates beautifully to black and white.
Not every selfie benefits from black and white conversion. Scenes where color provides important context or emotional impact lose something in monochrome. Sunsets, colorful outfits, or vibrant locations often work better in color. Consider whether removing color enhances or diminishes your specific selfie before committing to black and white.
Pro Tip: When shooting selfies you plan to convert to black and white, pay extra attention to lighting contrast and textures. These elements become more important in monochrome photography where color cannot provide visual interest.
The Psychology and Culture of Selfies
Selfies represent more than just photos. They reflect deep human needs for self-expression, connection, and documentation of our lives. Understanding the psychological and cultural dimensions of selfies provides context for why this form of photography has become so significant in modern life.
Why We Take Selfies
The selfie phenomenon taps into fundamental human psychology. Multiple motivations drive people to take and share self-portraits, often operating simultaneously beneath conscious awareness.
Self-Expression
Selfies allow people to present themselves to the world on their own terms. You control the angle, lighting, expression, and context, curating how others see you. This control provides a sense of agency over your public image that traditional photography taken by others cannot match. Selfies become a form of visual autobiography where you write your own story.
Social Connection
Sharing selfies creates and maintains social bonds. Each selfie you post invites interaction and engagement from friends, family, and followers. The likes, comments, and shares that follow provide social validation and reinforce relationships. In our increasingly digital world, selfies serve as a primary way people stay connected across distances.
Memory creation and documentation motivate many selfies. Photos help us remember experiences, places, and how we looked at different times in our lives. Selfies specifically capture our perspective and presence in those moments, creating more personal mementos than photos taken by others. Years later, selfies trigger memories not just of what we saw but how we felt.
Self-exploration through selfies helps people understand themselves and experiment with identity. Trying different looks, expressions, and styles in selfies allows safe experimentation with self-presentation. Teenagers and young adults particularly use selfies as tools for identity development, trying on different personas to discover who they are and want to become.
The Evolution of Selfie Culture
Selfies existed before smartphones made them ubiquitous, but the technology revolution of the past fifteen years transformed occasional self-portraits into a global cultural phenomenon. Understanding this evolution provides perspective on where selfie culture might go next.
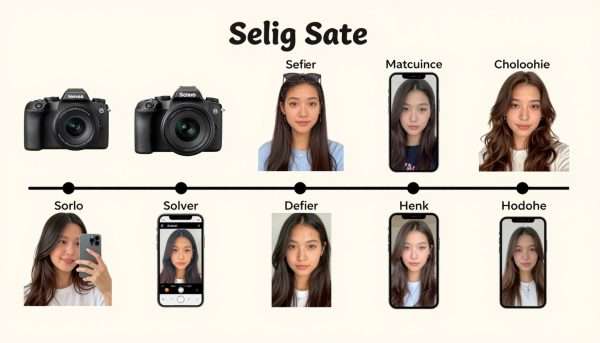
Early digital cameras made self-portraits technically possible but awkward. You had to hold the camera at arm’s length and hope you were in frame, unable to see yourself before taking the shot. These constraints made self-portraits relatively rare compared to photos taken by others.
The front-facing camera changed everything when it became standard on smartphones around two thousand ten. Suddenly you could see yourself while composing the shot, dramatically improving results and encouraging experimentation. The term “selfie” gained widespread use during this period, eventually being named Oxford Dictionary’s word of the year in two thousand thirteen.
Social media platforms evolved to accommodate and encourage selfies. Instagram launched in two thousand ten with filters that made everyone feel like a professional photographer. Snapchat introduced disappearing photos and playful filters in two thousand eleven. These platforms created ecosystems where selfies thrived, with interfaces and features specifically designed around self-portrait photography.
Selfies Across Different Cultures
While selfies appear everywhere around the world, different cultures approach and interpret them differently. These variations reflect deeper cultural values and norms about self-presentation and privacy.
Asian cultures, particularly in Japan and Korea, embraced selfie culture early and enthusiastically. The aesthetic preferences in these regions favor soft, bright lighting and smooth skin, influencing beauty filter development globally. The peace sign and other playful poses common in Asian selfies spread worldwide, becoming international selfie conventions.
Western selfie culture initially emphasized authenticity and casual snapshots but has evolved toward more polished, intentional presentation. The rise of influencer culture in the United States and Europe professionalized selfies, with many people treating them as mini photo shoots requiring planning and editing.
Middle Eastern selfie culture navigates complex terrain around privacy, modesty, and self-expression. In some communities, selfies provide one of few socially acceptable ways for women to assert individual identity and share aspects of their lives with chosen audiences. The tension between traditional values and modern self-expression plays out differently across various Middle Eastern cultures.
Gender Differences in Selfie Behavior
Research consistently shows differences in how different genders approach selfies. These patterns reflect broader social dynamics around appearance, self-presentation, and social media use.
Women take and share more selfies than men on average across most age groups and cultures. This gap reflects societal pressures around appearance that affect women more intensely than men. Women face more scrutiny about their looks and receive more social rewards for attractive presentation, creating stronger incentives for selfie participation.
Men who take frequent selfies sometimes face social stigma or questions about their masculinity, though this is changing among younger generations. Men’s selfies more often emphasize activities, accomplishments, or humor rather than pure appearance. The context and framing differ even when the basic act of self-photography remains the same.

The Impact of Selfies on Self-Image
The relationship between selfies and self-esteem proves complex and sometimes contradictory. Research reveals both positive and negative effects on how people see themselves.
Positive effects include increased comfort with your appearance and better understanding of your best angles and expressions. Regular selfie-taking can reduce camera anxiety and help you feel more confident in photos generally. The creative control selfies provide can empower people to present themselves authentically rather than relying on how others choose to photograph them.
Negative effects emerge when selfie-taking becomes compulsive or when social media validation becomes too important to self-worth. Constant comparison with idealized images on social media can fuel anxiety and dissatisfaction with your own appearance. The gap between heavily edited selfies and reality sometimes creates distorted self-perception, particularly among younger users.
Mental Health Note: If you find yourself spending excessive time taking or editing selfies, feeling anxious when selfies do not receive expected engagement, or comparing yourself negatively to others’ selfies, consider taking breaks from selfie-focused social media. Your worth extends far beyond any photo.
Professional Uses of Selfies
Beyond personal use, selfies have found professional applications across various fields. This evolution elevated selfies from casual snapshots to legitimate tools for business and creative work.
- Influencers and content creators use selfies as primary business tools for brand building
- Professionals use polished selfies for LinkedIn profiles and professional networking
- Real estate agents, sales people, and service providers use selfies to build personal connections
- Journalists and activists document events from personal perspectives using selfies
- Artists incorporate selfies into contemporary art exploring identity and self-representation
The line between amateur and professional selfies has blurred as people recognize the power of authentic self-presentation in professional contexts. The same skills that create engaging personal selfies translate directly to professional image building.
Essential Equipment and Accessories for Better Selfies
While you can take great selfies with just your smartphone, certain accessories dramatically expand your creative possibilities and improve consistency. Investing in the right equipment pays dividends in better photos and easier shooting experiences.
Selfie Sticks and Extenders
Selfie sticks remain the most popular selfie accessory for good reason. They solve fundamental problems with arm-length limitations and expand creative options significantly.
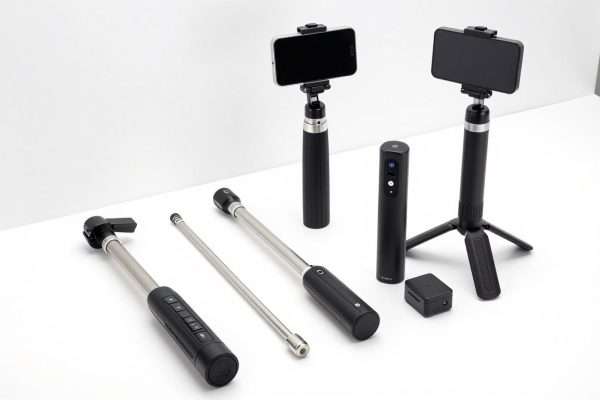
Basic wired selfie sticks connect to your phone’s headphone jack and trigger the camera through the headphone button press. These simple, inexpensive options work reliably without batteries or pairing. However, many newer phones lack headphone jacks, limiting compatibility.
Bluetooth selfie sticks include a wireless remote that pairs with your phone. This setup allows you to shoot from the stick’s extended position or detach the remote and shoot from distance. The wireless freedom proves valuable for group selfies and creative compositions. Look for models with long battery life and secure phone grips.
Tripod-selfie stick hybrids transform from handheld sticks into stable tripods with folding legs. This versatility makes them ideal for solo travelers or anyone who wants both extension and stability options. The tripod function enables hands-free shooting perfect for group selfies or timed shots where you want to appear more natural.
Lighting Equipment
Controlled lighting transforms selfie quality more than any other equipment investment. Portable lighting solutions give you flattering illumination anywhere, any time of day.
Ring Lights
Ring lights create even, shadowless illumination with a distinctive circular catchlight in the eyes. Available in sizes from small clip-on models to large standing versions, ring lights adapt to different shooting scenarios. Dimmable LED ring lights let you adjust brightness to match ambient conditions. Larger ring lights often include phone mounts built into the center, creating all-in-one selfie stations.
Panel Lights
LED panel lights provide broader, softer illumination than ring lights. These rectangular or square lights work well for both photography and video. Many panel lights offer adjustable color temperature, letting you match or intentionally contrast with ambient lighting. Smaller panels clip onto your phone or selfie stick, while larger versions mount on tripods.
Portable light wands create dramatic lighting effects and work well for creative selfies. These long, thin LED lights can be positioned at various angles or moved during long exposures to create light painting effects. Light wands typically cost less than ring lights while offering unique creative possibilities.
Phone Mounts and Grips
Secure phone mounting ensures stability and frees your hands for better posing. Various mounting solutions serve different needs and shooting styles.
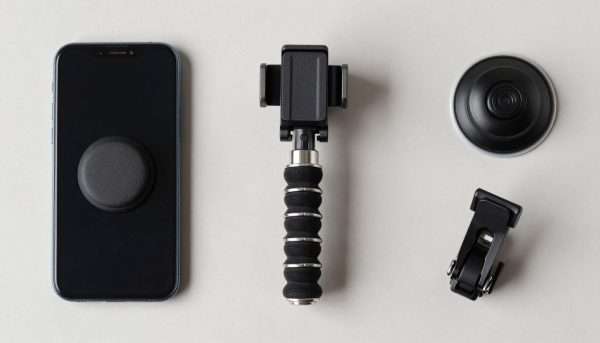
Smartphone grips improve your hold on the phone while shooting. These grips attach to your phone’s back and provide a secure finger hold or wrist strap. Some include kickstands for propping your phone at angles. Grips particularly help prevent drops during one-handed selfie shooting.
Tripod mounts adapt standard tripods for smartphone use. Most use spring-loaded clamps that accommodate various phone sizes. Quality mounts grip securely without damaging your phone and allow rotation between portrait and landscape orientations. Universal mounts work with any phone, while brand-specific mounts often integrate more elegantly with particular models.
Flexible tripods with bendable legs wrap around poles, branches, or railings, expanding mounting options beyond flat surfaces. These versatile supports enable selfies in locations where traditional tripods would not work. The flexible legs also fold into handheld grips for stable shooting without a support surface.
Lenses and Filters
Clip-on lenses expand your phone camera’s optical capabilities. While phone cameras continue improving, external lenses still offer effects and focal lengths that internal optics cannot match.
- Wide-angle lenses capture more of the scene, perfect for group selfies or showing environmental context
- Macro lenses enable extreme close-ups that reveal details invisible to the naked eye
- Fisheye lenses create dramatic curved perspectives for creative, artistic selfies
- Telephoto lenses bring distant subjects closer, though less useful for selfies than other lens types
- ND filters reduce light entering the lens, enabling creative effects in bright conditions
Quality matters significantly with clip-on lenses. Cheap lenses introduce distortion, soft focus, and color fringing that degrade image quality. Invest in lenses from reputable manufacturers designed specifically for smartphone photography. Multi-element glass lenses outperform single-element plastic versions significantly.
Backdrops and Backgrounds
Portable backgrounds give you complete control over what appears behind you in selfies. While most selfies use natural environments, controlled backdrops ensure consistency and eliminate unwanted elements.
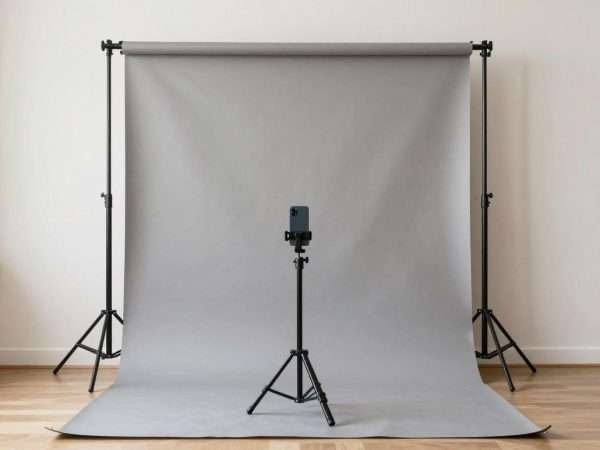
Collapsible pop-up backdrops fold compact for storage but expand to create instant photo backgrounds. Available in various colors and patterns, these backdrops suit different moods and styles. Neutral grays and whites provide clean, professional looks, while colors or patterns add personality and visual interest.
Fabric backdrops hang from walls or stands and create seamless backgrounds for selfies. Muslin, canvas, and vinyl backdrops each offer different textures and characteristics. Wrinkle-resistant materials work best for portable use, as creased backdrops look unprofessional in photos.
Remote Shutter Controls
Remote shutters let you trigger your camera without touching the phone. This capability proves essential for tripod-mounted selfies and group shots where you want everyone’s hands visible and natural.
Bluetooth remotes pair with your phone and trigger the camera from distance. Small key-fob style remotes fit in pockets or hands without being visible in photos. Range varies by model, but most work reliably within thirty feet. Battery life differs significantly between brands, with quality remotes lasting months on a single charge.
Smartwatch integration turns wearable devices into remote shutters. If you already own a smartwatch compatible with your phone, you can likely trigger the camera from your wrist. This integration eliminates the need for separate remotes and provides a convenient option always on your person.
Complete Your Selfie Equipment Kit
From versatile tripod-stick combinations to professional lighting solutions, the right accessories transform your selfie game. Quality equipment lasts for years and makes every selfie easier and better. Explore complete kits that include multiple accessories at bundle prices.
Troubleshooting Common Selfie Problems
Even experienced selfie-takers encounter challenges that result in disappointing photos. Knowing how to diagnose and fix common problems saves frustration and improves your success rate. These solutions address issues that frequently plague selfies.
Focus and Sharpness Issues
Blurry or out-of-focus selfies waste opportunities and cannot be fixed after the fact. Understanding why focus problems occur helps you prevent them consistently.
Autofocus Failure
Your phone’s autofocus sometimes locks onto the wrong part of the scene, leaving your face soft and blurry. This happens most often in cluttered environments or when something closer to the camera attracts the autofocus system. Manually tap your face on the screen to force focus on the correct area. Most phones display a focus box showing where sharpness is locked.
Motion Blur
Camera shake or subject movement during exposure creates blur that no amount of focusing can prevent. Brace your arms against your body, use a tripod, or increase lighting to enable faster shutter speeds. In low light, your phone uses slower shutter speeds that make any movement visible as blur. Adding light or using your phone’s night mode reduces motion blur.
Exposure Problems
Photos that appear too dark or too bright fail to show you at your best. Exposure issues often stem from challenging lighting that confuses your phone’s automatic exposure system.
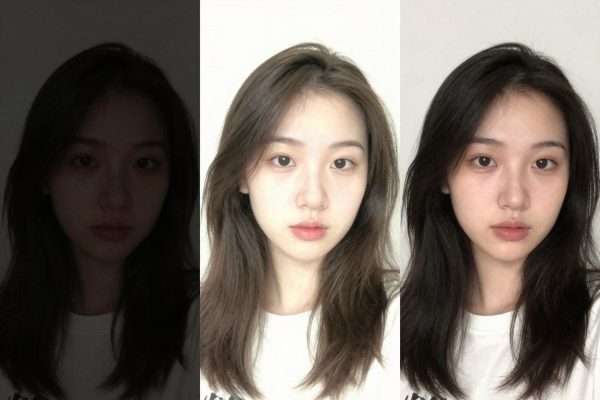
Backlit situations where bright light comes from behind you cause the most common exposure problems. Your phone exposes for the bright background, making your face appear too dark or even silhouetted. Tap your face on the screen to tell the phone to expose for you rather than the background. Alternatively, adjust exposure compensation manually by sliding the brightness control after tapping to focus.
Very bright or very dark environments fool automatic exposure systems. Against dark backgrounds, your phone might overexpose your face trying to brighten the scene. Against bright backgrounds, it might underexpose to prevent blown highlights. Manual exposure control overcomes these limitations, letting you override automatic decisions that do not serve your selfie.
Color and White Balance Issues
Strange color casts make skin tones appear unnatural and unappealing. These color problems usually trace back to mixed lighting or incorrect white balance settings.
Mixed lighting from different sources creates color confusion. For example, combining warm tungsten indoor lighting with cool daylight from windows produces areas with different color temperatures. Your phone cannot perfectly balance both, resulting in some areas appearing too warm and others too cool. Eliminate mixed lighting when possible by turning off artificial lights and using only window light, or vice versa.
Fluorescent and LED lights often create green or blue color casts that make skin look sickly. Adjusting white balance settings to “fluorescent” mode helps, but moving to better lighting provides superior results. If stuck with fluorescent lighting, plan to color correct in editing rather than trying to fix it in-camera.
Unflattering Angles
Even good technique sometimes produces unflattering results if angles do not suit your particular face shape and features. Solving angle problems requires experimentation to discover what works specifically for you.
- Double chin appearance often results from shooting from too low an angle – raise the camera higher
- Overly prominent forehead comes from shooting from too high – lower the camera slightly
- Wide face appearance results from holding the camera too close – extend your arm fully or use a selfie stick
- Unflattering nose size comes from wide-angle lens distortion when too close – increase distance from camera
- Asymmetrical features become more obvious from certain angles – test both sides to find your preferred side
Background Distractions
Objects in the background that you did not notice while shooting can ruin otherwise good selfies. These distractions pull attention away from your face and make photos look amateurish.
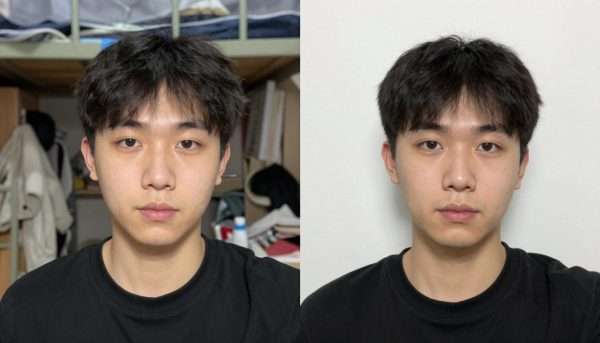
Scan the entire frame before shooting, not just your face. Look specifically for poles or lines that appear to grow from your head, bright spots that draw the eye, messy clutter that tells unwanted stories about your space, and people or objects in the background that photobomb your selfie. Moving a few feet in any direction often eliminates background problems without changing your lighting or composition significantly.
Use portrait mode or adjust aperture settings to blur distracting backgrounds. When you cannot physically move away from problematic backgrounds, shallow depth of field renders them as soft, unrecognizable blurs that do not compete with your face for attention.
Skin Texture and Appearance
Selfies sometimes emphasize skin imperfections more than you see in mirrors. Understanding why this happens and how to minimize it improves satisfaction with your selfies.
Harsh lighting exaggerates skin texture, pores, and imperfections. Soft, diffused lighting from overcast conditions or window light minimizes these issues naturally. If you must use harsh light, position it at a slight angle rather than straight on to add dimension without emphasizing texture excessively.
Very high resolution cameras capture more detail than necessary for social media sharing. If skin texture concerns you, reduce the resolution setting on your camera. Social media platforms compress images anyway, so maximum resolution provides minimal benefit while potentially emphasizing details you prefer minimized.
Technical Glitches
Sometimes selfie problems stem from technical issues with your phone or camera app rather than photography technique. These solutions address common technical difficulties.
Frozen or laggy camera apps benefit from force-closing and restarting the app. Accumulated temporary files and memory issues slow camera performance over time. Completely closing the camera app and reopening it clears these problems. If issues persist, restart your entire phone to clear system-level memory issues.
Inconsistent focus or exposure often indicates dirty camera lenses. Fingerprint smudges, dust, and oil create a hazy film over the lens that degrades image quality significantly. Clean your camera lens regularly with a soft microfiber cloth. The improvement often amazes people who have never considered lens cleaning.
Software Updates: Camera performance improves with software updates that refine algorithms and fix bugs. Check for both phone system updates and camera app updates regularly. Manufacturers frequently release updates that improve photo quality, sometimes dramatically.
The Future of Selfie Technology and Trends
Selfie technology continues evolving at a rapid pace. Understanding emerging trends and future developments helps you stay ahead of the curve and anticipate new creative possibilities. The next few years will bring changes that make today’s selfies look primitive in retrospect.
AI and Computational Photography
Artificial intelligence transforms smartphone photography more than any hardware advancement. AI algorithms analyze scenes in real time and make intelligent adjustments that were impossible just a few years ago.
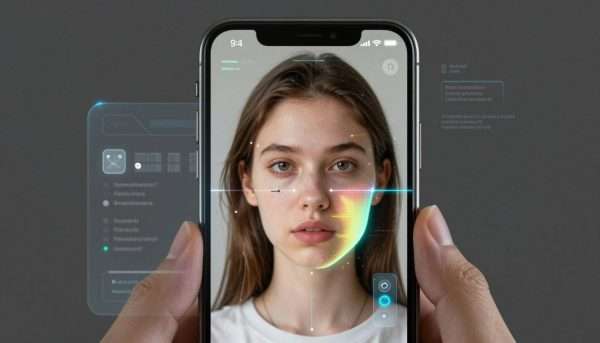
Smart scene detection identifies that you are taking a selfie and automatically adjusts settings for optimal results. The AI recognizes faces, determines lighting conditions, and applies appropriate processing without any input from you. These systems keep improving as they analyze millions of photos and learn what settings produce the best results in different scenarios.
Real-time beauty enhancement applies subtle adjustments while you compose your selfie. The AI smooths skin, brightens eyes, and enhances features instantly, showing you the processed result before you even take the photo. Future systems will learn your preferences and apply consistent editing styles automatically across all your selfies.
Advanced depth mapping using multiple cameras or LiDAR sensors creates more accurate background separation. This enables better portrait mode effects and opens possibilities for creative background replacement or manipulation in real time. The boundary between foreground and background will become increasingly seamless as depth sensing technology improves.
Augmented Reality Integration
AR filters and effects have already become mainstream on platforms like Snapchat and Instagram. The next generation of AR selfie technology will blur the line between reality and digital enhancement even further.
Virtual Try-On
AR-powered virtual try-on features let you see how makeup, glasses, hairstyles, or even entire outfits look in your selfies before making purchases. This technology helps consumers make better buying decisions while creating fun, shareable selfie content. Brands increasingly use AR selfie features as marketing tools.
Environment Manipulation
Future AR systems will let you change entire environments in your selfies. Want to take a selfie on a beach while sitting in your living room? Advanced AR will make it possible with convincing realism. The technology might raise questions about authenticity, but it will undoubtedly become part of the selfie landscape.
Hardware Advancements
Camera hardware continues improving despite the physical constraints of thin smartphones. Future developments will enhance selfie quality in ways current technology cannot match.
Higher resolution front cameras will match or exceed current rear camera quality. Some phones already feature front cameras with forty or fifty megapixels. This trend will continue, enabling incredible detail in selfies and making front cameras viable for professional use cases beyond casual self-portraits.
Variable aperture lenses that adjust to different lighting conditions will become standard. These lenses open wide in low light to gather more photons and close down in bright conditions for sharpness throughout the frame. The technology already exists in some high-end phones and will trickle down to more affordable models.

Under-display cameras will eliminate the notch or hole-punch that currently houses front cameras. The camera will sit beneath a transparent section of the display, becoming invisible when not in use. Early versions of this technology show promise, though image quality lags behind traditional camera placement. Refinement over the next few years will bring under-display cameras into mainstream devices.
Social and Cultural Trends
Beyond technology, social attitudes and cultural norms around selfies continue evolving. Understanding these trends helps you create content that resonates with contemporary audiences.
- Authenticity over perfection drives backlash against heavily edited selfies and unrealistic beauty standards
- Behind-the-scenes content showing the work behind perfect selfies gains popularity and engagement
- Diverse representation in selfie culture expands as more voices and perspectives gain platforms
- Privacy concerns influence how and where people share selfies as awareness of data use grows
- Professional selfie content blurs lines between amateur and professional photography
Emerging Platforms and Formats
New social platforms and content formats influence how people take and share selfies. Staying current with these developments helps you adapt your selfie strategy to where audiences congregate.
Short-form video platforms emphasize motion and personality over static perfection. TikTok and similar apps make video selfies just as common as photos. This shift changes what makes a successful selfie, prioritizing authentic personality and entertainment value over technical perfection.
Three-dimensional selfies capture depth information that can be viewed from different angles. Some smartphones already include 3D scanning capabilities, though the technology remains in early stages. As 3D and VR technologies mature, 3D selfies might become as common as 2D photos today.
Looking Ahead: The most significant changes in selfie culture might not be technological at all. As people recognize both the positive and negative aspects of selfie culture, we may see more balanced, mindful approaches to self-documentation and social media sharing.
Sustainability and Ethical Considerations
The environmental and social impact of technology receives growing attention. Future selfie culture will likely consider these factors more explicitly.
Device longevity versus constant upgrades creates tension between wanting latest camera technology and reducing electronic waste. Some users embrace keeping phones longer and maximizing current capabilities rather than chasing marginal improvements through frequent upgrades.
Digital well-being features in phones help users manage time spent taking and editing selfies. These tools acknowledge that while selfies provide value, compulsive selfie behavior can negatively impact mental health. Finding balance becomes increasingly important as technology makes selfie-taking ever easier and more compelling.
Conclusion: Your Selfie Journey Continues
Taking a great selfie combines technical knowledge, creative vision, and practice. This guide has covered everything from basic camera holding techniques to advanced creative approaches, giving you a comprehensive foundation for selfie photography. The skills you have learned here apply whether you take selfies occasionally to document special moments or regularly create content for social media.
Remember that the best selfie technique is one that feels natural to you and produces results you love. While general principles guide successful selfies, your unique face, personality, and style should shine through every photo you take. Do not be afraid to experiment with different approaches until you discover what works best for your specific features and creative vision.

Practice makes perfect in selfie photography just as in any other skill. The first few selfies anyone takes rarely represent their best work. Each selfie you take teaches you something about lighting, angles, expression, or composition. Pay attention to what works and what does not, building a personal knowledge base that improves with every photo session.
The tools and technology available for selfies will continue improving, but fundamental principles of lighting, composition, and authentic expression remain constant. Master these basics and you will take great selfies regardless of what camera technology you use. New features and capabilities should enhance your existing skills rather than replace them.
Consider selfies as both an art form and a form of personal documentation. They tell the story of your life from your own perspective, capturing moments, feelings, and appearances that would otherwise disappear into memory. Years from now, you will look back at selfies from today and remember not just how you looked, but how you felt and what mattered to you at this time in your life.
Key Takeaways
- Lighting matters more than any other factor in selfie quality
- Angle and distance affect how your features appear dramatically
- Natural expressions always look better than forced poses
- Simple backgrounds keep focus on your face
- Subtle editing enhances without creating artificial results
- Practice and experimentation build skills over time
Moving Forward
- Start with basic techniques before attempting advanced methods
- Learn your best angles through experimentation
- Invest in simple accessories that expand possibilities
- Study selfies you admire to understand what makes them work
- Share selfies that feel authentic to who you are
- Enjoy the creative process without obsessing over perfection
Technology has made photography accessible to everyone in ways previous generations could never imagine. Anyone with a smartphone has the power to create beautiful images documenting their life and expressing their creativity. Selfies democratize photography, putting creative control in the hands of the subject rather than requiring a photographer.
The social aspect of selfies connects people across distances and creates communities around shared interests and experiences. When you share a selfie, you invite others into your world and open opportunities for connection and conversation. These digital touchpoints maintain relationships and build new ones in our increasingly online social lives.
Balance in selfie culture matters as much as technical skill. While selfies provide value for self-expression and connection, they should enhance rather than dominate your life. The best selfies capture genuine moments and authentic feelings, not manufactured perfection designed purely for social media validation.
Continue Your Photography Journey
Ready to expand your photography skills beyond selfies? Explore comprehensive courses and resources that teach smartphone photography, editing techniques, and creative composition. Transform from a casual selfie-taker into a skilled mobile photographer.
Your selfie journey is uniquely yours. The techniques in this guide provide a roadmap, but your creativity, personality, and vision determine the destination. Some people will use these skills to build social media followings or professional brands. Others will simply capture better memories with friends and family. Both paths have equal value.
Keep learning and adapting as technology and trends evolve. The selfie landscape in five years will look different from today, just as today differs dramatically from five years ago. Stay curious about new techniques, tools, and creative approaches while maintaining the fundamental skills that transcend temporary trends.
Most importantly, have fun with selfies. At their best, they capture joy, confidence, creativity, and authentic self-expression. Whether you are documenting a special occasion, sharing a moment with friends on social media, or simply practicing your photography skills, selfies should bring more positivity into your life. If they become a source of stress or negative feelings, step back and remember why you started taking selfies in the first place.
The world of selfie photography welcomes everyone regardless of experience level. Every person who takes selfies contributes to a global conversation about identity, beauty, experience, and human connection. Your selfies matter because they represent your unique perspective on the world and your place within it. Keep shooting, keep learning, and keep sharing your vision with others.

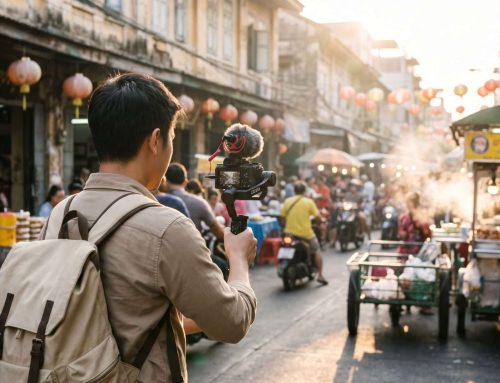
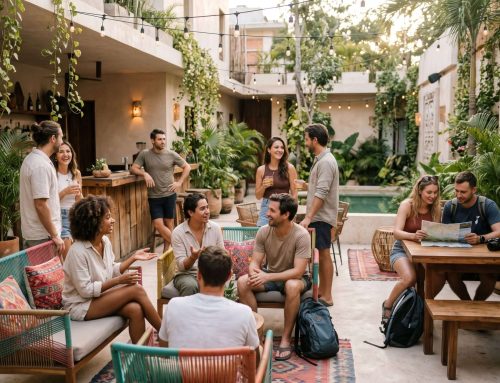
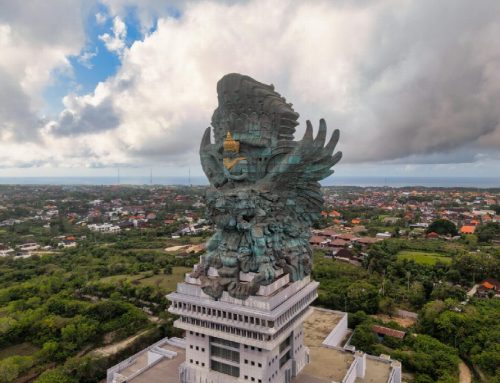

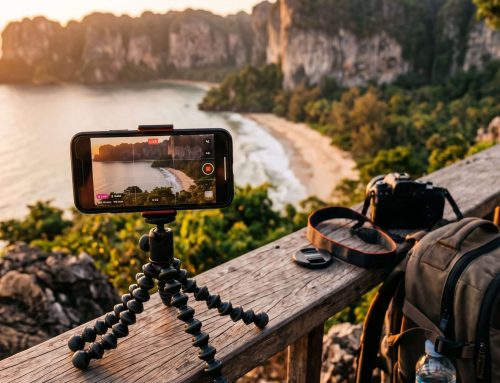



Sharing Selfies on Social Media Platforms
Taking a great selfie represents only half the equation. How you share that selfie on social media affects its reach and impact. Different platforms have different audiences, technical requirements, and best practices that influence how your selfies perform.
Platform-Specific Considerations
Each social media platform has unique characteristics that affect how selfies appear and perform. Understanding these differences helps you optimize selfies for each platform where you plan to share them.
Instagram prioritizes visual content and offers the most sophisticated photo-sharing features. The platform supports high-resolution images and provides built-in editing tools. Instagram Stories disappear after twenty-four hours, making them perfect for casual, everyday selfies, while feed posts remain permanent and warrant more polished images. Instagram’s square and vertical formats influence how you should crop and compose selfies for optimal display.
Facebook reaches the broadest demographic range of any social platform. Selfies on Facebook often document life events and special occasions rather than everyday moments. The platform compresses images somewhat, so extremely high-resolution photos may lose quality. Facebook’s algorithm favors posts that generate genuine engagement through comments and shares rather than simple likes.
TikTok and Snapchat focus on video content but also support photo sharing. These platforms skew toward younger audiences and favor authentic, unpolished content over heavily edited or professional-looking images. Selfies on these platforms often include filters, effects, or augmented reality elements that add playful, creative touches.
Timing Your Posts
When you share selfies affects how many people see and engage with them. Different audiences are active at different times, and posting strategically increases visibility and engagement.
Weekday Patterns
Weekday mornings during commute hours and lunch breaks see high social media activity as people browse during downtime. Evening hours after work also generate strong engagement. Weekday engagement tends to be brief but frequent, with people checking social media during short breaks throughout the day.
Weekend Dynamics
Weekend posting patterns differ significantly from weekdays. People spend more sustained time on social media during weekend mornings and afternoons. However, Saturday evening engagement often drops as people engage in offline activities. Sunday afternoon typically sees strong engagement as people relax at home.
Your specific audience may have different patterns than general trends. Pay attention to when your posts typically receive the most engagement and adjust your posting schedule accordingly. Most social platforms provide insights about when your followers are most active.
Captions That Enhance Selfies
The caption accompanying your selfie provides context, personality, and encouragement for engagement. Well-crafted captions significantly increase how people interact with your selfies.
Authentic captions that share genuine thoughts or experiences resonate more strongly than generic statements. People connect with honesty and vulnerability. Share the story behind the selfie, what you were feeling, or what made that moment special. These personal touches transform a simple selfie into a meaningful post that encourages genuine interaction.
Questions invite engagement by giving followers an easy way to participate. Ask about their experiences related to your selfie, solicit opinions, or request recommendations. Questions generate comments more reliably than statements, increasing your post’s algorithmic visibility on most platforms.
Humor makes captions memorable and shareable. A clever, funny caption can elevate an ordinary selfie into something people want to share with their own followers. Self-deprecating humor works particularly well, showing you do not take yourself too seriously and making you more relatable to your audience.
Hashtag Strategy
Hashtags categorize your selfies and make them discoverable to people beyond your existing followers. Strategic hashtag use expands your reach, but poorly chosen hashtags can make posts appear spammy or desperate for attention.
Hashtag effectiveness varies by platform. Instagram allows up to thirty hashtags and using twenty to thirty can increase reach. Twitter favors one to three hashtags maximum. Facebook hashtags provide minimal benefit. Learn the norms for each platform where you share selfies.
Engagement and Interaction
How you interact with responses to your selfies affects your relationship with your audience and influences future algorithmic visibility. Active engagement creates community and encourages continued interaction.
Respond to comments on your selfies, especially within the first hour after posting. This early engagement signals to platform algorithms that your post generates genuine interaction, increasing its distribution to more people. Thoughtful responses to comments also make followers feel valued and encourage them to engage with future posts.
Like and comment on other people’s selfies and posts. Social media works best as a two-way street where you give attention as well as receive it. Supporting others in your community encourages them to reciprocate, building a network of mutual engagement that benefits everyone.
Privacy and Safety Considerations
Sharing selfies publicly requires awareness of privacy and safety implications. What you share and how you share it affects your personal security and digital footprint.
Privacy Tip: Review location services settings on your phone and social media apps. Many apps automatically tag photos with exact GPS coordinates unless you disable this feature. Sharing your precise location with every selfie can create security risks.
Consider who can see your selfies by adjusting privacy settings on each platform. Public posts reach the broadest audience but also expose you to potential negative interactions. Friends-only or followers-only sharing provides more control over your audience while still allowing social connection.
Avoid sharing selfies that reveal sensitive information about your location, schedule, or personal life. Selfies taken at home might show your address or identifiable features. Vacation selfies advertise that your home sits empty. Think critically about what information your selfies reveal beyond just your appearance.
Learn Advanced Social Media Strategies
Want to build a stronger social media presence with your selfies? Discover advanced strategies for growing your following, increasing engagement, and creating content that resonates with your target audience across multiple platforms.